Quick Start
The first steps to use the Digital Storage mod is to unlock the milestone in the HUB called Basic Networks. This milestone can be found in Tier 3.
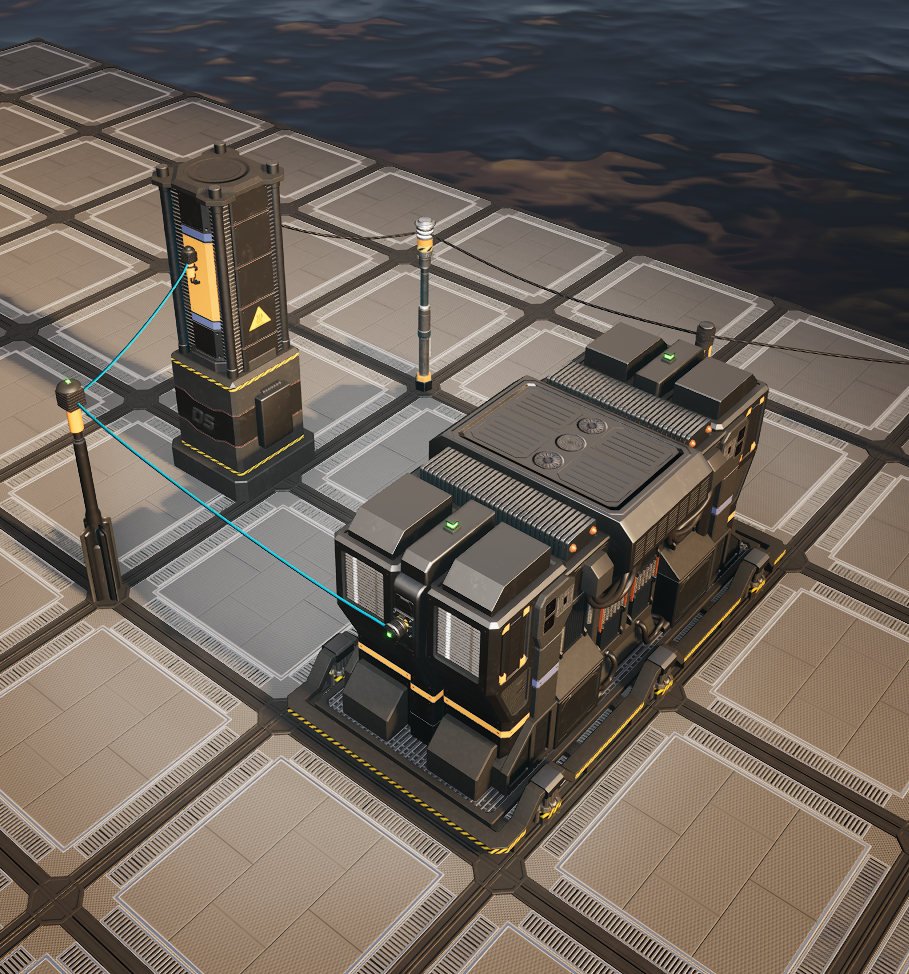
Go to the build menu and in the Digital Storage section find the Network Distributor building and place this down.
|
The Network Distributor has two connection points, one for Power and one for Network. |
Connect the Network Distributor to your Power Grid.
Go to the Build Menu in Digital Storage category and place down a Network Pole near the Network Distributor. Using a Network Cable connect the Network Distributor to the Network Pole.
Now to Power all the devices on the network, place down a Network Power Adapter near the Network Distributor.
Connect the Power Adapter to the Power Grid. Then connect the Power Adapter using a Network Cable to the Network Pole placed earlier.
Configuring The First Network
Open up the Network Distributor UI, you will see one network entry already in there.
From here you can change the Name or Network ID.
Once you are happy with the first network Name/Network ID click the Save button. Then click the Link button to link that network to the Network Distributor.
You can now Exit the Network Distributor UI, you should now see the Green light on top of the Network Pole and also on the Power Adapter.
By default the Power Adapter will automatically find the network from connected Network Poles or other connected Power Adapters.
Optionally you can force the Network by Opening the Power Adapter UI and clicking the Link button next to the desired network.
|
There is a power reset in the Power Distributor GUI you can check if everything is connected/linked and the poles are still showing red |
Configuring Storage
Storage Terminal
Now that you have your first network setup successfully and everything is showing Green, its time to configure your storage.
Place down a Storage Terminal and connect this to the network using Network Cables. The Storage Terminal is used to view, import & export items on your network.
Servers
Now to the main attraction! Storing Items
Items are stored in Servers which come in two sizes 1U & 2U.
Place down a Server Rack from the Build Menu in the Digital Storage category. Then connect the Server Rack to the network using network cables.
Once that has been placed, open the Build Menu and click on 1U Server.
|
Servers and drives are unlocked in tier 3 under Basic Network Drives. |
To place the Server in the Server Rack, while building hover over the Server Rack or another Server in the Rack, you should see that the Server snaps inside the Server Rack.
Once placed in the Server Rack you should see the Green connection indicator on the front of the Server.
If you see a Red indicator something is not connected correctly. Follow the Network connections all the way back to the Network Distributor, making sure everything is connected correctly.
Storage Drives
Once you have the Server placed in the Server Rack its time to fill the Server with storage <a href="/refinedrd/latest/ds/info/drives.html#_Drives">Drives</a>.
Craft 4 DS Drive (256) drives, you can craft them in the Work Bench or in an assembler.
Format and partition the drives using the Drive Terminal.
|
More drive options can be unlocked in the MAM |
Each drive of the same type do stack in your inventory.
Open the Server UI and then CTRL + Click on a storage drive in your player inventory, this will place all the Drives in the Server.
Digitized items are stored in Partitions on each Drive (1 Item type per Partition), click on the Partitions button under each Drive in the Server UI.
There is two ways to create partitions, you can either click the Quick Partition button at the bottom of the Server UI. This will create 1 partition for each drive.
Alternatively you can click the Add Partition button and this will create a new Partition.
Clicking the Blue Edit button on the Partition will open the Edit Partition window. This is where you can alter the size of the partition and filter items for the partition.
|
Unfiltered partitions will accept any type of item it wants in a first come first server basis. To avoid the system backing up its best to have all items going through the network to have filtered partitions assigned. |
Storing Items
Now to actually automate importing / exporting items on your network.
The best way to do this is to use the Storage Connection Adapter. [NOTE] ==== The Storage Adapter can be unlocked in DS tab in the MAM, along with more drives and adapters. ====
Storage Connection Adapter.
If you have an existing Storage container that you want to import/export to/from your network this is the best method.
Disconnect any belts from the container, then open the Build Menu and click on the Storage Connection Adapter. Whilst building hover over the container and the adapter will snap to the container.
Once placed make sure the adapter is connected to the Network using a Network Cable, and ensure that the indicator is showing Green.
Now open the containers UI you will see an additional tab at the top of the window. Click on the Adapter tab.
On the left you can see all the available items that you can select to import/export.
Under this you can change whether to import / export items, this will automatically lock the belt connections on the container.
For this example we will import the items from the container to the network.
Click on the Import To Network button at the bottom. Next click on the item you want to import to the network. This will then show on the right hand section.
You will see a toggle switch with Num and Empty next to them, this will be pre-selected for you, < for export and > for import.
|
Entering a number on the left side of this toggle switch will import all items and keep the specified number of items in the container. |
Finally click the Save button, this will then import the items to the network.