Buildable
Next up, we’ll make a decorative buildable - the Plantpot of Knowledge,
a monument to your progress in the tutorials thus far.
A buildable is simply anything you will be able to place with the buildgun.
Even if it is just a simple foundation or fence, it is still an FGBuildable.
Like items, buildables have descriptors to define their names and descriptions, but they also have an actor representation to act as the structure in the game world. There’s also a hologram which controls its placement. We don’t need a conveyor mesh for our building, since our buildings probably shouldn’t be moving around as items on conveyor belts. However, we’ll definitely still want a mesh for our building’s appearance in-game.
To stay organized, we’ll create a separate folder for each of our buildables to hold their textures, meshes, and so on in one place. Create new folder called "Buildables" in your mod’s root folder, then create another folder for our first Buildable. Let’s call it "DocBuild".
Adding the Actor
Next, create a blueprint of type FGBuildable with f.e. the name "Build_DocBuild" inside your folder. This is the actual building object in which the model and factory logic are defined, among other things.
Now we need to populate the buildable description by simply filling the default values.
Set M Hologram Class to FGBuildableHologram, which will cause the FGBuildable to automatically find the hologram by itself.
Fill M Display Name with something like "Doc Buildable" and M Description with "An example building that showcases the MI_Factory_Base_01 material.".
|
Holograms control how buildings get placed. Later on, you can write your own to allow upgrading buildings or to have snapping functionality. You can learn more about how holograms work on the Buildable Holograms page. |
As you can see in the Components pane in the top left, the actor already contains a few components.
These are inherited from the parent class FGBuildable.
Note that the building does not currently have any visuals.
To fix this, add a new FGColoredInstancedMeshProxy component in the center of the viewport.
This component is an optimized version of the base Unreal static mesh component that supports Satisfactory’s Customizer painting system.
To tell it what mesh to display, assign one in the "Static Mesh" field of the component’s Details panel.
Import this example Mesh, the Plantpot of Knowledge,
which we’ll use for this building.
Use the default import settings when prompted.
The build gun uses the origin when targeting the mesh to be built or snapped. This Actor is also where you can define the snapping area and the clearance area (mClearanceData), but we won’t do that for now. Look to other machines and examples for inspiration as there are several relevant settings to make those behaviors work correctly.
Make it Paintable
We want to make our buildable paintable, meaning, able to be colored with the Customizer.
Because the FGBuildable-class already provides a basic implementation for that, we just need our buildable’s mesh to use the MI_Factory_Base_01 material.
The provided example mesh already provides a proper UV map for said material, so you will not need to edit the UVs of the provided mesh.
You will need to do so for your own models.
More info on the materials already in the game can be found at Main Materials documentation page.
You must ensure that the materials of the Mesh and Buildable are set to point to a material called MI_Factory_Base_01 within Content/FactoryGame/-Shared/Material.
If this does not exist, create a placeholder material in its place, and it will point to the correct texture within the game.
|
More than one |
Adding the Descriptor
Similar to how we created a descriptor for our item, we now need to create one for our buildable of type FGBuildingDescriptor.
Simply add a new Blueprint of type FGBuildingDescriptor to the same folder as the buildable itself and call it f.e. "Desc_DocBuild".
|
Make sure you use |
Building descriptors are very similar to item descriptors.
This is because FGBuildingDescriptor extends the item descriptor class,
meaning it inherits all of its fields and adds a few more.
Note that not every item descriptor field is useful to a building descriptor. For example, the stack size and conveyor mesh of a building are irrelevant to its functionality despite being editable.
Make sure to set the M Buildable Class field to your Build_DocBuild actor.
This field determines what building actor will be placed when the player uses the build gun.
The building’s final display name and description are also pulled from this asset;
the descriptor’s fields for this purpose are not used, which is part of why they are greyed out in the editor.
The descriptor category, subcategory, and icon also determine how the building will appear in the Build Gun. You can use this example image as the icon.
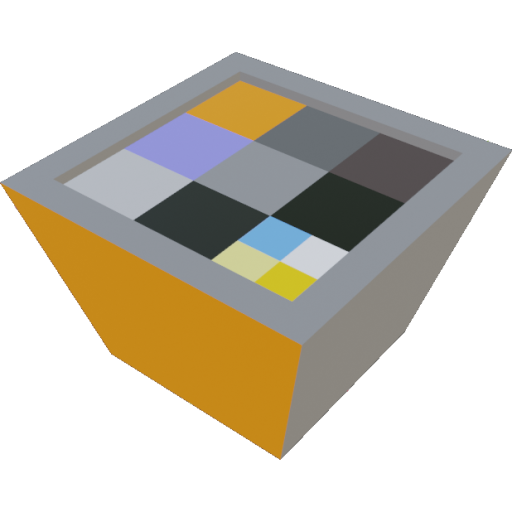
Building Descriptors use categories to determine where they appear in the build gun.
It’s possible to create your own categories,
but for now, use BC_TradingPost in the M Category field and SC_Progression as the only array entry in the M Sub Categories field.
This will sort your building near the HUB in the build menu.
|
Make sure to select valid Categories and Sub Categories for your buildings! Without this data selected, your building will either not appear in the build gun unless searched for by name, or crash the game when the build gun is opened. Since the category field is multi-purpose,
the editor’s picker unfortunately includes category options that aren’t relevant to buildings.
Building categories (for the You can find out what categories and sub categories the base game’s buildings use by opening their placeholders in the editor. |
Define the Recipe
To define how our building is constructed we will use an FGRecipe,
just like we did for our custom item.
Create a new FGRecipe asset and set ProducedIn to FGBuildGun,
then add Ingredients entries to define the cost of constructing the building.
The Product field should contain exactly one entry -
the FGBuildingDescriptor asset you just created for your buildable.
Don’t forget to list your newly created recipe in the unlocks of a Schematic otherwise it won’t be registered.
That’s it! You don’t need to register anything else. When the recipe gets loaded, everything else also gets loaded and the buildable in the save file has soft references to the classes, and if they get loaded also the classes like our newly created buildable get loaded.
Trying it Out
If you load up the game now, you should be able to build the Doc Build in game. You should be able to paint it with the Customizer, and it should look roughly like it does in the icon image.
Troubleshooting
Placing the building creates nothing in the world
Make sure that your building has an FGColoredInstancedMeshProxy component and that a mesh is assigned to it.
Building has a gray checkerboard texture
Check both the Buildable’s mesh component and the mesh’s own settings ensure the correct material,
MI_Factory_Base_01, is selected.
Building doesn’t appear in the build gun
-
Make sure all of your mod files are saved before packaging the mod.
-
Make sure the FGBuildingDescriptor has a category and sub-category set. Without one, the build gun doesn’t know where to display it and it will only appear when directly searched for.
-
Check that
BP_BuildGunis in the producers list of the FGRecipe. -
Ensure the recipe is in the Unlock array of a schematic you have created.
-
Ensure the schematic unlocking the recipe is listed in your root Game World Module.
-
Check that you have purchased the schematic in-game.
Crash when selecting the building in the build gun
The crash message will likely contain UStruct::IsChildOf() and AFGBuildGun::GotoBuildState()
You forgot to assign a hologram class in the FGBuildable - the default is None, which leads to this crash.
Something Else
If something went wrong, feel free to contact us on the Discord for help.