Setting Up Incredibuild
Satisfactory is a large game. As such, it can take an enormous amount of time to compile the relevant, even on high end hardware. In this section, we will guide you through the process of setting up Incredibuild, which is a build acceleration tool for Microsoft Visual Studio and Jetbrains Rider. It can significantly reduce the amount of time it takes to compile the modding project, which is especially helpful if you’re doing a lot of C++ development.
How it works
Incredibuild works by allowing you to distribute build tasks across multiple of your own computers in order to speed up compilation of code. It does this locally on your computer and across your home network, so there is no need for you to own a build server or connect to one in the cloud. If you want a more in-depth technical explanation of how Incredibuild accomplishes this, we recommend you check out this document from Incredibuild themselves.
Requirements
All of this software must be self-hosted on your own hardware. In order for Incredibuild to run smoothly, your primary computer and any helper computers must meet these minimum specifications:
-
The latest version of Windows 10 or 11 64-bit
-
4 CPU Cores
-
4 GB Memory
-
At least 30 GB Available Storage (Preferably solid state but not necessary)
-
100 Mbps Network Connection
All computers must be on the same network in order to be utilized. If you have an antivirus, you will need to add an exception to your Incredibuild and Visual Studio installation folders. Also, the coordinator makes use of RabbitMQ, so you will not be able to install it on a computer with RabbitMQ already installed.
Applying for a license
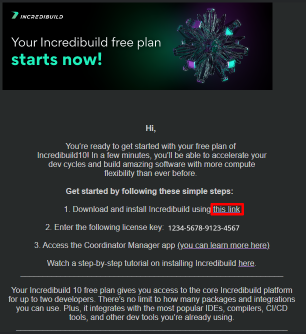
Before we can install Incredibuild, we need to get a license. Now don’t worry, it’s completely free if you only intend to use it non-commercially. All you need to do is visit the Incredibuild Pricing Page and click on the "Free Forever" plan. Just fill out the form with your details (You can use your name for the "Company Name" field since you only need a personal license) and submit it. Within a few minutes you should receive an email in your inbox containing a link to download Incredibuild and a license activation code that looks something like this:
Installing Incredibuild
Now that you have your license, we can begin installing Incredibuild. If you haven’t already, you can download the agent installer from here. Run the installer and read the license agreement before accepting.
For the install configuration, select "Grid" mode. This will allow you to initiate builds from your computer and distribute the load across any other computers you install the agent on. Next, you will need to enter the license key you received earlier. After that, choose which directory to install the agent to and make sure to select "Install the Incredibuild add-in for MS Visual Studio IDE" if you are using Visual Studio.
You also have the option to use SSL to encrypt communication between your agents, but we will not be configuring this since we do not need to for our specific use case. Instead, select "Do not use a trusted certificate". Finally, choose a username and password for the coordinator interface and then install the agent.
When the installation is complete, you can either go to the next section and set up Incredibuild on multiple computers, or skip to the Post-Install section.
Multiple Agents
Now that you have your primary coordinator set up, you can install Incredibuild on any other computers you have to combine their processing power and make your builds go even faster. To do this, simply repeat the steps from before on your other computer, but instead of selecting "Grid", select "Agent" for the configuration. When you get to the section asking for the coordinator’s IP address, complete the steps below first before continuing with the installation.
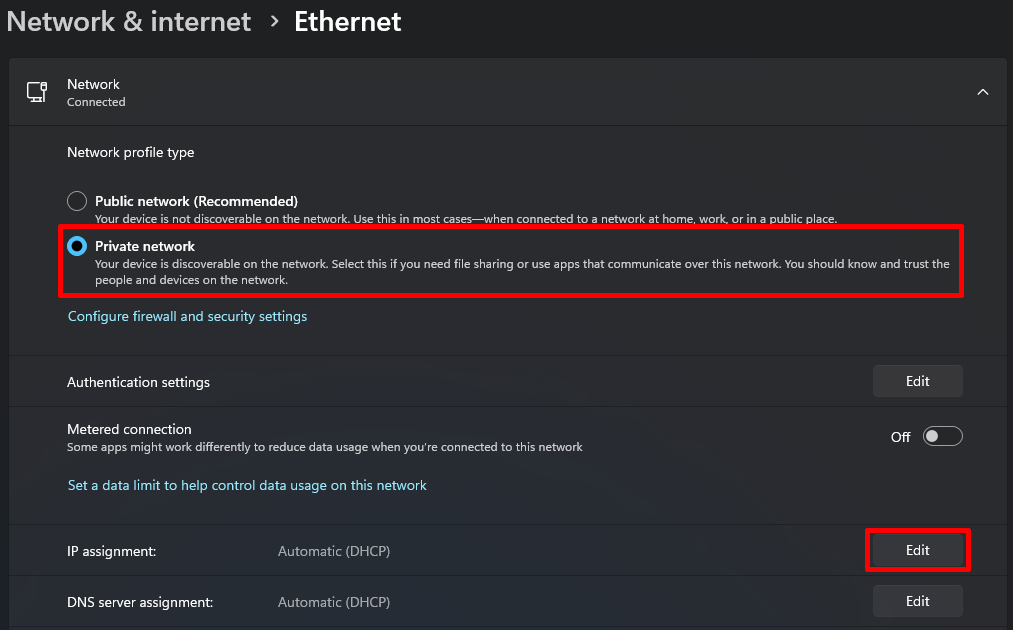
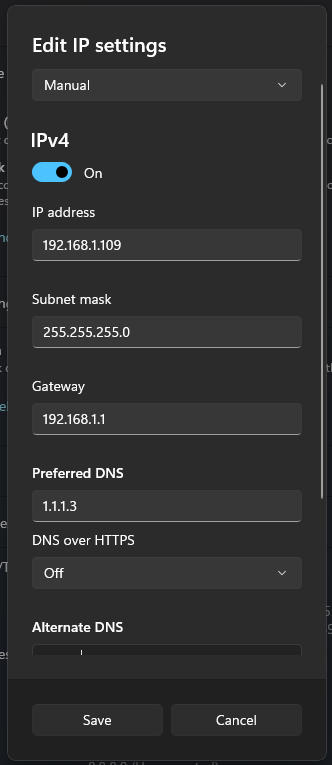
On your primary computer where you installed the coordinator, you will need to configure a static IP address. To do this on Windows 10 or 11, open the settings app and go to Network and Internet → Wi-fi (or Ethernet if you are using that). Ensure that the "Network Profile Type" is set to "Private", then find "IP Assignment" and click the "Edit" button.
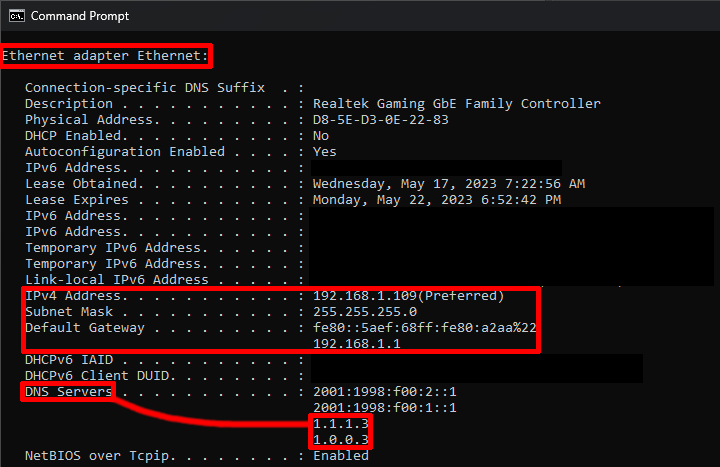
Next, open search, type "cmd", and select "Command Prompt" from the list of results. In the terminal window, type "ipconfig /all". This will create a list of all network adapters on your computer. Find the adapter you are using, and copy the details for your Internal IP Address, Subnet Mask, and Default Gateway. You can also configure preferred DNS servers if you would like. Save the changes and move on to the next step.
Finally, on your other computer, enter the internal IP address of your primary computer into the setup field and install the agent.
Now, Incredibuild will automatically distribute builds across both machines,
and you can see how they’re being utilized by checking the coordinator web panel (defaults to https://localhost:8000).
|
If you are presented with an "Insecure Site" error when trying to access the coordinator interface, click on the "Advanced" button, then on "Proceed". This is caused by the coordinator not having SSL configured, and it is completely normal behavior. |
Post-Install
Now that you have installed and configured Incredibuild, you are ready to begin accelerating your project compilations! Whenever you initiate a build in Visual Studio, Rider, or Unreal Engine, they will automatically delegate the job to your Incredibuild agent(s). And, you should see a significant reduction in compile times across all projects, not just the modding project.
|
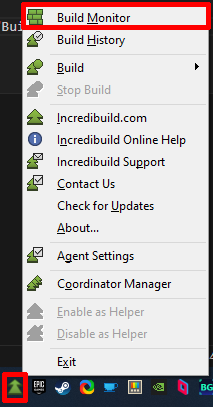
You can monitor the progress of your build more closely by right-clicking the system tray icon for Incredibuild and selecting "Build Monitor".
|