Testing Your Mods
Testing your mods to ensure that content is accessible and there are no bugs present is an important step in development. Careful testing before release can save you from having to release multiple versions in quick succession in order to fix a bug.
This page lists some helpful resources and information regarding testing your mods.
SML Logging
SML Logging is a valuable troubleshooting and testing tool, especially for blueprint mods.
You can find more information on how to use and configure it, as well as how to launch a live log viewer when you launch the game, on the Logging page.
If you select text in the log terminal window, it will freeze the game until you press 'enter' to deselect it. This can help with reading things before they would normally scroll by.
Since the log terminal is a regular Windows Command Prompt window, you can right click on its top bar and set some default customization values, such as where the window spawns and how wide it is, which will be applied every time the terminal opens. You can use this to have it always open on a second monitor, for example. Be aware that the values you set here will affect every instance of Command Prompt on your system. See the Launch Script Enhancements section below for another method of controlling where the window will appear.
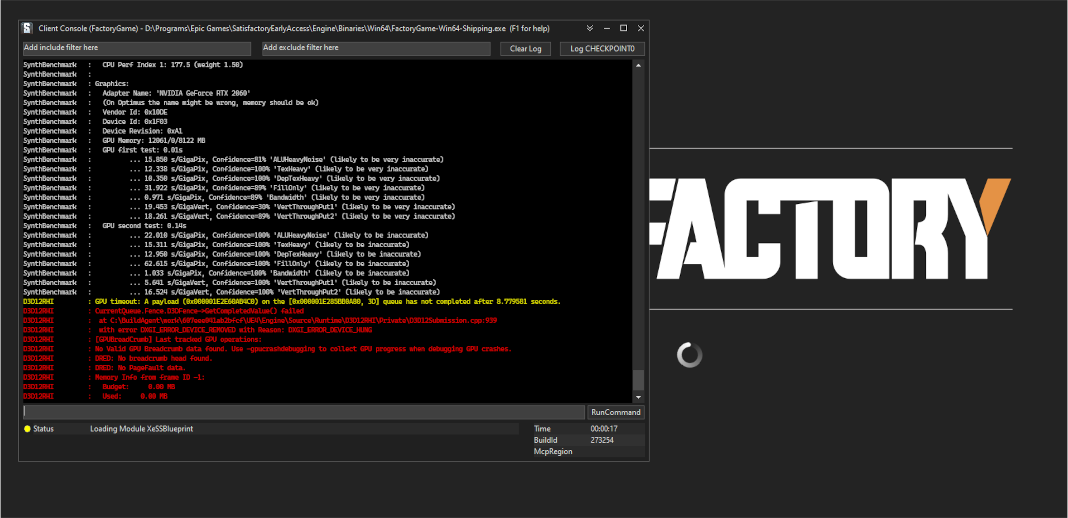
Unreal Console
The Unreal Console is a useful tool for debugging your mods. It extends the original log terminal mentioned in the previous section with some new features:
-
Options to filter (include/exclude) displayed log messages
-
Clearing the displayed log
-
Creating numbered "checkpoint" log markers
-
Running console commands from outside the game window (especially useful for dedicated servers)
-
See the game’s current status regardless of log position
-
Selecting displayed log messages no longer freezes the game, which you may consider a benefit or a drawback.
In order to use the new console, add the following to your game’s command-line launch arguments:
-Log -NewConsole
If you don’t know how to configure launch arguments, refer to this guide.
Now, when you launch the game, you should now see the Unreal Console appear as a separate window.
Cheats
Functionality build into the game’s Cheat Board and Unreal Console Commands can expedite mod testing.
Developer Utility Mods
A number of mods have been created that assist with mod development, debugging, and testing.
Find them on ficsit.app by using the Tag Filter feature
to view mods tagged #developer-utility.
Quick Launch Script
Testing mods often involves frequent restarts of the game.
You can shave some time off of this process by launching via a script that loads you directly into the game world.
In order to use this script, create a file with the .ps1 extension somewhere convenient to you.
Next, copy the contents of the below codeblock into the file.
|
You must modify the section near the top of the script
labeled |
If you have never ran a powershell script before on your Windows install, you may need to modify the system execution policy to allow them to run.
param (
	[Parameter(HelpMessage="Launcher to use (steam, epic). Level 1 of the script's GameDirs config option.")]
		[string]$launcher = "steam",
	[Parameter(HelpMessage="Side to use (client, server). Level 2 of the script's GameDirs config option.")]
		[string]$side = "client",
	[Parameter(HelpMessage="Branch to use (stable, experimental). Level 3 of the script's GameDirs config option. Not supported by Steam launcher.")]
		[string]$branch = "stable",
	[Parameter(HelpMessage="When present, launches 2 copies of the game instead of 1. Most other arguments only apply to the first copy, read the script implementation for specifics.")]
		[switch]$multiplayer = $false,
	[Parameter(HelpMessage="When using the -multiplayer flag, how long to wait before launching the second copy in milliseconds.")]
		[int]$multiplayerLaunchDelayMs = 5000,
	[Parameter(HelpMessage="When present, the game will automatically load into the last save file you played. If used with the -multiplayer flag, the save must be in the `common` subfolder of the SaveGames directory.")]
		[switch]$loadLatestSave = $false,
	[Parameter(HelpMessage="When present, the second copy of the game will automatically run the `open 127.0.0.1` console command to connect to the first copy. Must be used with -loadLatestSave flag.")]
		[switch]$clientAutoJoin = $false,
	[Parameter(HelpMessage="Launch the game with the -WaitForDebugger flag, telling SML to hold the game's loading process to allow attaching a C++ debugger.")]
		[switch]$waitForDebugger = $false,
	[Parameter(HelpMessage="Launch the game with the -NoExceptionHandler flag, enabling JIT debugging and disabling the UE crash reporter.")]
		[switch]$noExceptionHandler = $false,
	[Parameter(HelpMessage="When present, print info about what copy of the game is being launched.")]
		[switch]$info = $false,
	[Parameter(HelpMessage="When present, the game will not actually be launched, allowing testing this script. Required files still may be created based on other parameters.")]
		[switch]$test = $false
)

# ========================================================================================================================
# Configure this section to match your system and preferences
# ========================================================================================================================

# Arguments to launch the game with
$CommonArgs = "-EpicPortal", "-log", "-NewConsole", "-nosplash"

# Edit the below "path"s to contain your game paths for these possible install locations
$GameDirs = @{
	steam = @{
		# Note: Steam only allows installing either client or server at a time
		# The script doesn't know which branch you have selected in Steam's own UI
		client = @{
			steam = @{
				# Example: "C:\Steam\steamapps\common\Satisfactory"
				path = "UNSET"
				exeName = "FactoryGameSteam"
				appid = "526870"
				# Example: value 12345678910111213 from path `%LOCALAPPDATA%\FactoryGame\Saved\SaveGames\12345678910111213`
				savegameSubfolderName = "UNSET"
			}
		}
		server = @{
			steam = @{
				# Example: "C:\Steam\steamapps\common\SatisfactoryDedicatedServer"
				path = "UNSET"
				exeName = "FactoryServer"
				savegameSubfolderName = "UNSET"
			}
		}
	}
	epic = @{
		client = @{
			stable = @{
				path = "UNSET"
				exeName = "FactoryGameEGS"
				# Example: value 1234letters0and0numbers0longer12 from path `%LOCALAPPDATA%\FactoryGame\Saved\SaveGames\1234letters0and0numbers0longer12`
				savegameSubfolderName = "UNSET"
			}
			experimental = @{
				path = "UNSET"
				exeName = "FactoryGameEGS"
				savegameSubfolderName = "UNSET"
			}
		}
		server = @{
			stable = @{
				path = "UNSET"
				exeName = "FactoryServer"
				savegameSubfolderName = "UNSET"
			}
			experimental = @{
				path = "UNSET"
				exeName = "FactoryServer"
				savegameSubfolderName = "UNSET"
			}
		}
	}
	# Optionally define additional -launcher options here. Hierarchy is -launcher > -side > -branch
}

# Optionally configure the window size and position on the screen (2 sets for 2 copies when using -multiplayer)
$Game1 = "$CommonArgs" #, "-windowed", "-WinX=0", "-WinY=32", "ResX=960", "ResY=1040"
$Game2 = "$CommonArgs" #, "-windowed", "-WinX=960", "-WinY=32", "ResX=960", "ResY=1040"

# Location of your savegame root folder for usage with -loadLatestSave
# The default should be fine but you can change it if desired
# It gets combined with the savegameSubfolderName in the GameDirs data to make the full path
$SaveFolder = "$($env:LOCALAPPDATA)\FactoryGame\Saved\SaveGames\"


# Put custom overrides here if you want (for example, if you want to specify values for $GameDirs in one place)
# Example
# $GameDirs["steam"]["client"]["steam"]["path"] = "C:\Steam\steamapps\common\Satisfactory"

# ========================================================================================================================
# End configuration section
# ========================================================================================================================

$AutolaunchTempFileName = "AutolaunchScript_Temp.ini"

function CreateSteamAppidFile([string]$filepath, [string]$appid) {
	# Required to launch steam copies
	$SteamAppidFilePath = "$filepath\Engine\Binaries\Win64\steam_appid.txt"
	try {
		# cast to void suppresses output
		[void](New-Item $SteamAppidFilePath -ItemType File -Force)
		Add-Content $SteamAppidFilePath $appid
	} catch {
		Write-Error "Failed to create/modify steam appid file ($SteamAppidFilePath), try running script as admin"
		Write-Error $_
		exit 1
	}
}

function ResolveGamePathFromParams() {
	$selectedLauncher = $GameDirs[$launcher]
	if ($selectedLauncher -eq $null) {
		Write-Error "Requested launcher '$launcher' was not defined in your script config options"
		exit 1
	}
	$selectedSide = $selectedLauncher[$side]
	if ($selectedSide -eq $null) {
		Write-Error "Requested side '$side' was not defined in launcher '$launcher' in your script config options"
		exit 1
	}
	$actualBranch = $branch
	if ($launcher -eq "steam") {
		Write-Debug "Script does not support multiple branches for steam, ignoring the -branch option of '$branch'"
		$actualBranch = "steam"
	}
	$gamePathInfo = $selectedSide[$actualBranch]
	if ($gamePathInfo -eq $null) {
		Write-Error "Requested branch '$actualBranch' for side '$side' was not defined in launcher '$launcher' in your script config options"
		exit 1
	}
	$gameDir = $gamePathInfo["path"]
	if (($gameDir -eq $null) -or ($gameDir -eq "UNSET")) {
		Write-Error "Selected game install '$selectedLauncher > $selectedSide > $actualBranch' is missing 'path' data, it should be the root directory of the install"
		exit 1
	}
	$gameEXE = $gamePathInfo["exeName"]
	if ($gameEXE -eq $null) {
		Write-Error "Selected game install '$selectedLauncher > $selectedSide > $actualBranch' is missing 'exeName' data, it should be the name of the executable file that launches the game"
		exit 1
	}
	if (-not ($gamePathInfo["appid"] -eq $null)) {
		CreateSteamAppidFile -filepath $gameDir -appid $gamePathInfo["appid"]
	}
	return $gamePathInfo
}

$gamePathInfo = ResolveGamePathFromParams

if ($info) {
	Write-Output "Using game install:"
	Write-Output $gamePathInfo
}


function PrepareArgs([string]$baseArgs, [switch]$applyFirstInstanceOnlyArguments, [System.Collections.Hashtable]$pathInfo) {
	$buildArgs = "$baseArgs"
	if ($clientAutoJoin -and (-not $multiplayer -or -not $loadLatestSave)) {
		Write-Error "clientAutoJoin flag requires multiplayer flag and loadLatestSave flag so there is a running game for the client to join"
		exit 1
	}

	if ($applyFirstInstanceOnlyArguments) {
		if ($waitForDebugger) {
			$buildArgs = "$buildArgs", "-WaitForDebugger"
		}
		if ($noExceptionHandler) {
			$buildArgs = "$buildArgs", "-NoExceptionHandler"
		}
		if ($loadLatestSave) {
			if ($multiplayer) {
				# Multiplayer GUID consistency consequence: can't see platform save files. Must be in the `common` subfolder
				$saveFolderUserId = "common"
			} else {
				$saveFolderUserId = $gamePathInfo["savegameSubfolderName"]
			}

			if (($saveFolderUserId -eq $null) -or ($saveFolderUserId -eq "UNSET")) {
				Write-Error "Selected game install is missing 'savegameSubfolderName' data in your script config options. It should be the name of the subfolder within your save directory containing the save files you want to use with -loadLatestSave. Your same file directory was entered as: $SaveFolder"
				exit 1
			}

			$fullSaveFolder = "$SaveFolder\$saveFolderUserId"

			# https://stackoverflow.com/questions/9675658/powershell-get-childitem-most-recent-file-in-directory
			# Steam keeps a steam_autocloud.vdf file in here that isn't a savegame
			$latestSaveFile = (Get-ChildItem $fullSaveFolder -Attributes !Directory -Filter *.sav | sort LastWriteTime | select -last 1)
			$latestSaveFileName = $latestSaveFile.Basename

			# Use Satisfactory's -ini feature to avoid needing to create an ini file and use -EngineINI (Unreal) to pass this info along
			$buildArgs = "$buildArgs", "-ini:Engine:[/Script/EngineSettings.GameMapsSettings]:GameDefaultMap=/Game/FactoryGame/Map/GameLevel01/Persistent_Level.Persistent_Level,[/Script/EngineSettings.GameMapsSettings]:LocalMapOptions=?skipOnboarding?listen?loadgame=$latestSaveFileName"
		}
	} else {
		# Only the second copy should run the connect command for clientAutoJoin
		if ($clientAutoJoin) {
			# ExecCmds uses UE syntax: https://dev.epicgames.com/documentation/unreal-engine/unreal-engine-command-line-arguments-reference
			$buildArgs = "$buildArgs", '-ExecCmds="open 127.0.0.1"'
		}
	}
	if ($multiplayer) {
		# CustomConfig: Satisfactory specific. More consistent multiplayer GUIDs
		# Multiprocess: Make the game not write user settings and other .ini files (unsafe operation while multiple copies are open)
		$buildArgs = "$buildArgs", "-CustomConfig=", "-Multiprocess"
	}
	return $buildArgs
}

$gameDir = $gamePathInfo["path"]
$gameEXE = $gamePathInfo["exeName"]
$GameString = "$($gameDir)\$($gameEXE).exe"

$Game1 = PrepareArgs $Game1 -applyFirstInstanceOnlyArguments
$Game2 = PrepareArgs $Game2

function BGProcess(){
	if ($test) {
		Write-Output "Test switch used, not actually launching the game"
		Write-Output "Arguments for this game instance: "
		Write-Output @args
		return
	} else {
		Start-Process -NoNewWindow @args
	}
}

BGProcess $GameString $Game1

if ($multiplayer) {
	if (-not $test) {
		sleep -m $multiplayerLaunchDelayMs
	}
} else {
	return
}

BGProcess $GameString $Game2
Usage
After the launch script has been set up, use flags when running it to controls its behavior. Note that in order to use the branch feature you must have separate copies of the game installed in the locations you specified in the config section.
Assuming your powershell file is named SFLaunch_Advanced:
-
.\SFLaunch_Advanced.ps1will launch the Steam Client version of the game - whichever branch you have installed with Steam, since that’s what the default arguments are set to. -
.\SFLaunch_Advanced.ps1 -loadLatestSavewill automatically load you into the last save file you made. -
.\SFLaunch_Advanced.ps1 -launcher epic -side server -branch experimentalwill launch the Epic Games Experimental Dedicated Server -
.\SFLaunch_Advanced.ps1 -multiplayerwill launch two copies of the Steam game client -
.\SFLaunch_Advanced.ps1 -launcher epic -branch experimental -multiplayerwill launch two copies of the Epic Experimental game client
|
When using the The |
Launch Script Enhancements
Unreal supports many
other command-line arguments, some of which may prove to be useful with MP testing.
For example, -windowed -WinX=0 -WinY=0 will open the game in the top left corner of the screen.
Similar arguments also exist for the console window (ConsoleX and ConsoleY).
You can also specify what resolution you want the game to run at: -WinX=1280 -WinY=720.
If you want windows to open on other monitors, you will need to use either negative or larger numbers for the arguments. The top left corner of your primary monitor is X=0, Y=0.
Combining these options, you could end up with launch args like those shown below, which will give each instance as much screen space as possible (while accounting for Title Bar and Start Menu height) on a 1920x1080 resolution screen, at the cost of an unusual aspect ratio.
$Args1 = "-EpicPortal", "-NoSteamClient", '-Username="'+$Username1+'"', "-WinX=0", "-WinY=32", "ResX=960", "ResY=1040"
$Args2 = "-EpicPortal", "-NoSteamClient", '-Username="'+$Username2+'"', "-WinX=960", "-WinY=32", "ResX=960", "ResY=1040"
Multiplayer Testing
Locally testing multiplayer functionality requires one of the following approaches:
Approach A: Launch 2 game clients
You can run two copies of the game client at once and join one from the other using the game’s host and play multiplayer system. Normally the Steam and Epic Games launchers don’t allow you to do this, but the launch script in the previous section can detach your game from the launcher so you can run two copies. Note that doing so breaks "normal" multiplayer functionality and only allows using IP multiplayer sessions.
|
If you own the game on both Epic and Steam you can join one client "normally" from the other. Note that this requires you to compile your mod for both the Epic and Steam targets which can slow down development. |
To do this:
-
Run the launch script to open 2 copies of the game client.
-
On the copy you designate as the host, select a save file to load. (or, use the
-loadLatestSaveflag) Before loading it, click the "Load Settings" button and change the "Session Type" toIP. -
On the copy you designate as the client, open the "Join Game" menu and enter the ip
127.0.0.1. Alternatively, use theopen 127.0.0.1console command from anywhere.
|
Using this approach does not generate consistent player GUIDs across game launches. If you need a player with a consistent GUID, use a normal Epic/Steam copy for one of the sides. |
Approach B: Launch Client and a Dedicated Server
You can run a dedicated server locally and connect to it with a game client. This has the downside of needing to compile your mod for both the client and server targets every time you want to test, which will slow down development.
Dedicated servers will automatically load a save file on launch, which may or may not speed up your testing process depending on what behaviors you are testing.
To use this approach, check out the dedicated server section of this page.
Load a Custom Level on Launch
The launch script demonstrates how to make the game to automatically load to the game world on launch, as opposed to the main menu, cutting down on load time and clicks when testing your mod. However, you will need to tweak it slightly if the level you want to load is a custom level.
Notice that the script’s loadLatestSave option uses the -ini:Engine: flag
to specify what level to load (GameDefaultMap).
You’ll need to modify the script to point to your custom level instead.
First, you’ll need to find the path to use for your custom level.
It’s based on the level’s asset path.
For example, Nog’s Level’s level asset is at the content root,
so its path is /NogsLevel/NogsLevel.NogsLevel.
Example Level’s is a few layers of folder deep,
it’s path is /ExampleMod/Maps/ExampleLevel/ExampleLevel.ExampleLevel.
Alter the line of the script that sets GameDefaultMap to point to the asset path of your custom level.
While you’re at it, there are a few other flags you can use to customize the loading process:
FG Map Options Switches from Archengius:
NOTE: These are from 2021 and may be outdated.

Switches found in AFGGameMode::InitGame:

?skipOnboarding (skip landing animation)
?allowPossessAny (allow possessing any pawn on the map, even if player IDs don't match)
?loadgame=<SaveGame Name Here Without Path and extension>
?startloc<Start Location Tag Name> (see AFGGameMode::ChoosePlayerStart_Implementation)
?sessionName=<Session Name> (sets mSaveSessionName, so apparently it determines autosave file name and probably name visible to other players?)
?DayLength=<Day Length In Minutes>
?NightLength=<Night Length In Minutes>

General notes:
  Regarding Start Location Tag Name:
      - TRADING_POST is the hub APlayerStart actor tag
      - Any APlayerStart actor with matching PlayerStartTag is selected
  Regarding Session Name:
      - Apparently there is a system of "bundled saves" that I know nothing about. Further investigation is required.

Switches found in AFGGameSession:

?Visibility=SV_Private/SV_Public (Session visibility)
?adminpassword=<Admin Password used in console command AdminLogin to gain host privileges>
Launch Argument: ExecCmds
SML 3.9.0 reimplements the Unreal Engine ExecCmds launch argument (normally excluded from shipping builds),
allowing automatically executing Unreal Console Commands
after the game loads.
You can read more about it in the Unreal documentation
The Quick Launch Script
uses this argument to implement the -clientAutoJoin flag.
Dedicated Servers
In order to start testing on dedicated servers, you will first need to set up your own dedicated server.
Setup
You have a few options for setting up the server. Consider which of these would work best for you before moving on to the next section.
Note that in order to perform the first time server claiming process you will need to use a client of the game that was launched normally (ex. through Steam or Epic). After the server claiming process is complete you can return to using a copy launched with the launch scripts described elsewhere on this page.
Option 1: Locally Installed Dedicated Server
You can install the dedicated server on your own computer and run it locally. This places extra strain on your computer and may not be feasible if you have a lower-end system. However, it is usually the easiest option to set up.
In this option, since the dedicated server will be sharing your own personal copy of the game’s save folder, attempting to upload saves to it will fail, since the save is already present in that folder. Selecting a save to use will require editing the server’s session name; follow the directions on the Satisfactory wiki to do this.
Since the server you will be testing with does not need to connect to the internet,
following the wiki’s directions for correctly authenticating with Steam or Epic servers are not required.
The minimum suggested launch arguments for a dedicated server is
.\FactoryServer.exe -log -EpicPortal -NoSteamClient.
You can connect to a locally hosted server either
through the normal server browser
or with the open console command, for example,
open 127.0.0.1.
Option 2: Remote Dedicated Server
You can also set up the dedicated server on another computer on your network. This avoids resource strain on your own computer.
It is possible to provide a network location in the Copy Game to Path Dev Packaging setting option,
for example //192.168.1.42/appdata/satisfactory,
meaning that Alpakit will handle copying and replacing the files on the remote server for you.
You’ll still need to restart it after every package for the server to reload file changes.
Option 3: Ask Nicely on Discord
A community member may have a dedicated server they can give you access to in order to test mods on. Ask in the modding help channels and see if anyone speaks up, but you may not get a response.
You will likely have to manually transfer each testing build of the mod to the server.
Option 4: Cross your Fingers
The option of last resort: you can compile your mods for dedicated servers and release them without testing them. Do not assume that silence means the mod is bug free - some users will not bother to report errors they encounter. If you choose this route, you should mention on your mod page that your mods haven’t been tested extensively on dedicated servers.
Installing and Claiming the Server
Now that you’ve decided how you want to set up your server, follow the directions on the Satisfactory Wiki to set up a working dedicated server and verify that you can connect to it with an unmodified client.
Once you’ve verified that you can connect to the vanilla server you can start adding mods to it. Either install them the same way an end user would or follow the process outlined in the Option section you selected above.