Installing Mods and Using the Satisfactory Mod Manager
Answers to frequent questions and troubleshooting steps for using the Mod Manager can be found on the Frequently Asked Questions page.
The Satisfactory Mod Manager (SMM) allows players to easily install mods, their dependencies, and the Mod Loader (SML) with minimal hassle. It connects to the Mod Repository (SMR), allowing for quick and easy installation of all mods.
The Mod Manager handles downloading the right files and putting them in the right place for you, so even if you launch the game from outside the Mod Manager (ex. normal Steam/Epic launch) mods will still be loaded.
|
The Satisfactory Mod Manager (SMM) and Satisfactory Mod Loader (SML) are two different things! SMM is the app that you download and interact with. It downloads files (mods and SML) to where they should go, so that you don’t need to deal with them. SML is the mod loader which provides APIs that mods use to cleanly interact with the game. You don’t need to do anything for SML - SMM will handle updating it for you! |
Installing the Mod Manager
-
Launch the game to the title screen at least once on your computer. You’ve probably already done this!
-
Download the Satisfactory Mod Manager. You can download it from ficsit.app or at https://smm.ficsit.app/, which automatically selects the correct download from the latest GitHub release based on your browser info. You can manually download for a specific platform from the GitHub releases page.
-
Depending on your browser, you may need to take some additional steps to convince it to download the file. Check your browser’s download queue to see if it claims the mod manager "is not commonly downloaded". Optionally, learn more about why this message appears here.
-
On Chrome, click the "Keep" button.
-
On Edge, click on the three-dots menu, select the "Keep" option, click "Show More", then click "Keep anyway".
-
-
Go to the heading that matches what operating system you’re using and follow the steps below to install it.
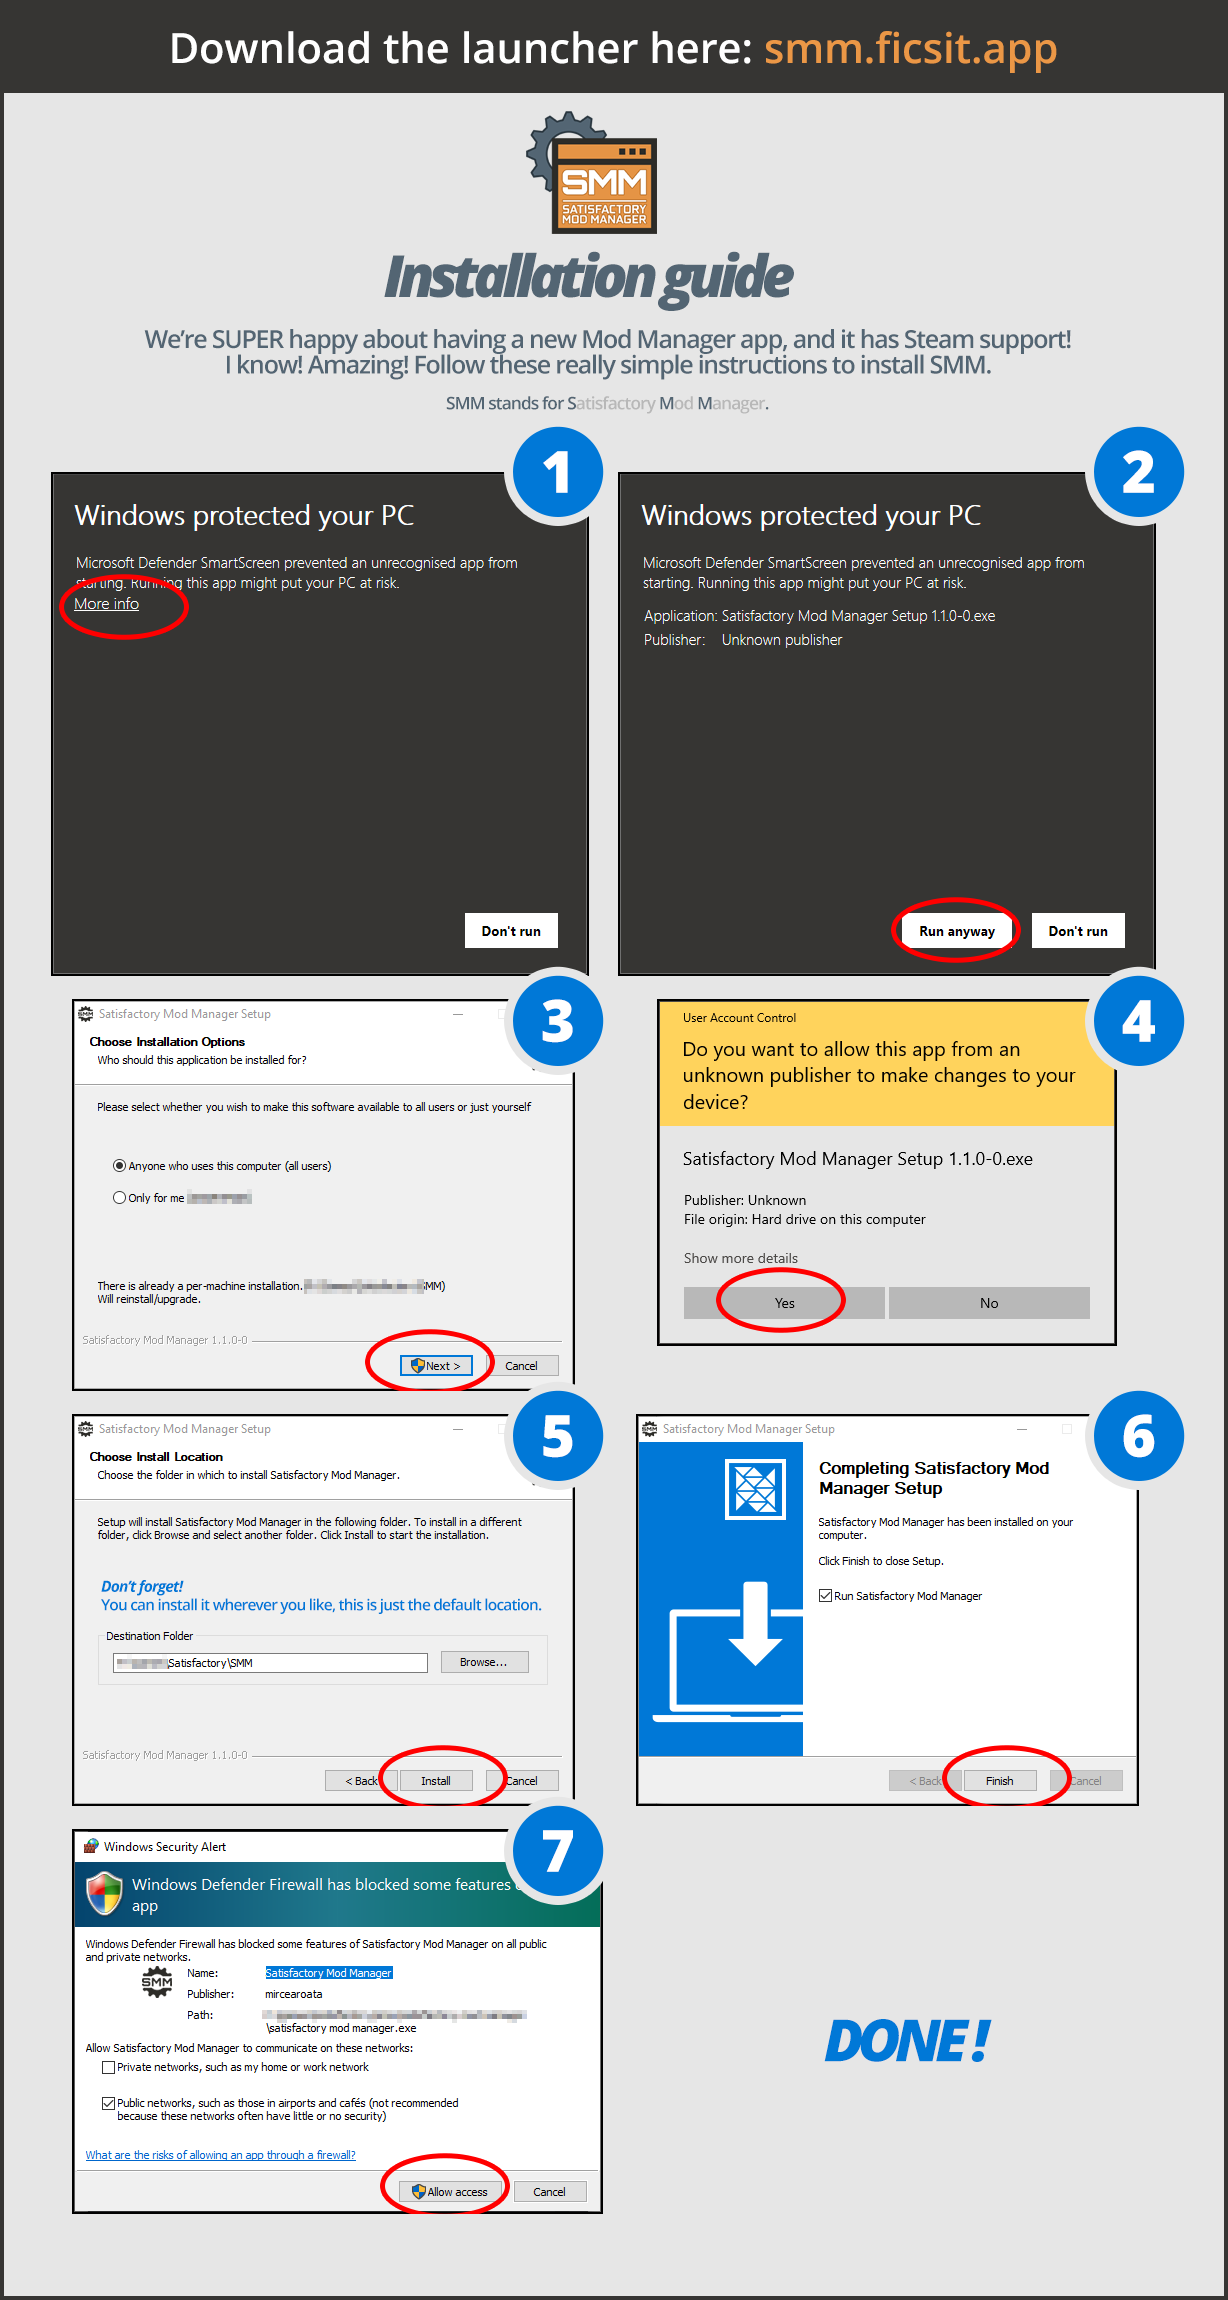
For Windows 11:
The installation process should be similar to that of Windows 10, but if you encounter a popup like this:
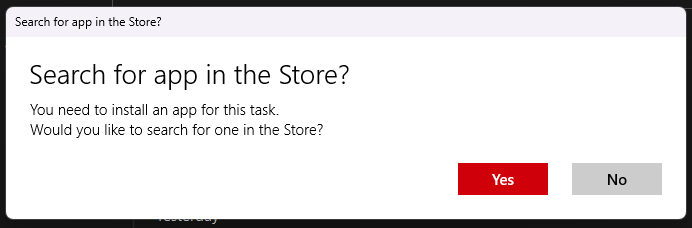
Ignore it because it is not correct. Instead, right-click on the installer in your file manager and go to the properties tab.
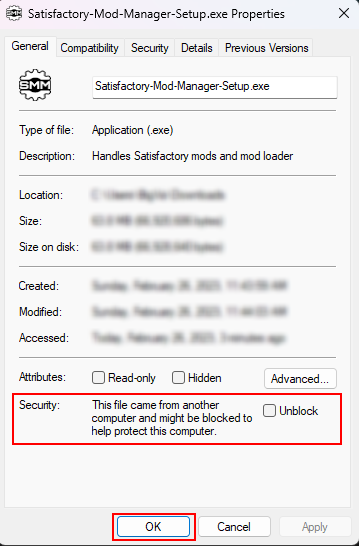
Click the "Unblock" box and hit OK or Apply. Then try running it again, and it should work. Refer to the above illustration for the rest of the steps.
Linux
Linux builds of the mod manager can be found on the GitHub releases page.
-
If you download the AppImage version, you may need to mark it as executable (via a GUI or
chmod +x filename) before running it. -
If you use the standalone version, note that you must have already installed any required packages mentioned on the GitHub releases page.
With Winget
If you have winget installed you can install the mod manager by running this command in a command prompt:
winget install SatisfactoryModding.SatisfactoryModManager.
Mac
Satisfactory does not officially support Mac, but you can use various technologies outside the scope of this guide, such as CrossOver, to get it running.
Satisfactory Mod Manager itself can run natively on Macs without any additional software by downloading the MacOS build from the GitHub releases page.
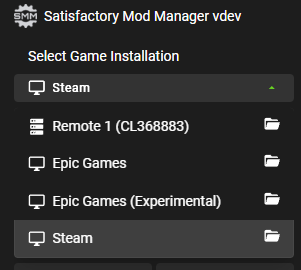
Managing Game Installations
Detecting your Game Installation Directory
After you’ve installed the Mod Manager it will automatically detect your game installation, and if you have multiple, you can pick between them with the "Install" dropdown.
If your game install is not automatically detected, try following the steps linked here.
We do not provide support for pirated copies of the game.
Dedicated Servers
Satisfactory Mod Manager can also manage mods on local or remote dedicated servers. They appear in the Game Installation dropdown once added. You can read more on the Installing Mods on Dedicated Servers page.
Installing Mods
To install a mod, simply click the download arrow button next to its listing in the Mod Manager. After the download completes, it will turn into another icon depending on its compatibility status.
The mod manager handles putting mod files in the relevant locations in your game install. If you launch the game outside of the mod manager, those files will still be in those folders, so you will still have your mods loaded!
If you’re encountering issues while trying to download mods, check the Frequently Asked Questions page for common fixes.
Managing Mods
You can use the funnel dropdown to filter what mods are displayed in the search panel. Here is what each option of the dropdown does:
-
All Modsshows every mod on Ficsit.app, regardless of if they work with your game version. -
Compatibleonly displays mods that are compatible with your currently selected game install. This is the suggested mode to keep the Manager in when searching for new mods to use. Learn more about compatibility statuses here. -
Favoriteshows mods you have clicked the "star" button on to mark as a favorite. A mod being favorited has no relation to whether or not it is installed. -
Queuedshows mods that have a pending operation to perform, such as downloading, uninstalling, or updating. -
The
Installedoption shows all mods that you have directly chosen to download, regardless of if they have been paused or not. -
The
Dependencyoption shows all mods that have been downloaded because they are required by another mod you Installed to function. -
The
Not Installedis the opposite of Installed, only showing mods that you have not directly chosen to download. This still includes mods that are dependencies of other mods you have installed. -
Enabledshows all mods that will load when you launch the game. It’s a combination of the Installed and Dependency options. -
Disabledis the opposite of Enabled, only showing mods you have downloaded but have "paused," which means they will not be loaded. Dependency mods will never show up here because they are removed when no other enabled mods require them.
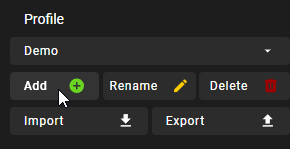
Profiles
Profiles are a convenient way to manage a collection of mods. Use them to switch between different sets of mods for different playthroughs or multiplayer sessions.
You can create, rename, and delete profiles using the buttons near the dropdown.
Use the dropdown to pick which profile you have selected. Selecting a profile will immediately unload the mods from the previous profile and set up the mods in the new profile.
Add or remove mods from a profile by using the mod manager as normal with that profile selected.
Uninstalling Mods
If you want to turn off mods, you must disable them from the mod manager so the files get removed.
To remove a mod from your system, use the box-check button that has taken the place of the download arrow - it will turn into a trash can when you hover over it.
Alternatively, click the Play button to "Pause" the mod, preventing it from loading with the game but still keeping the files downloaded on your computer. This can be useful if you want to temporarily turn a mod off for troubleshooting something.
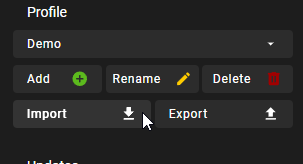
If you’re trying to remove a specific mod from your mod manager profile and it’s not working, try creating a new profile. You could also try exporting your profile, editing the file to delete the mod listing, then importing it again.
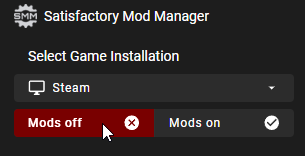
Turning Off All Mods
To turn off mods entirely, click "Mods off" in the top left corner of the mod manager.
If this fails for some reason, delete the "Mods" folder from your game’s install directory manually.
Installing a Specific Version of a Mod
By default, the Mod Manager will automatically install the latest version of a mod that it thinks is compatible with your game version.
However, it will avoid versions that end in a prerelease tag (ex. 1.0.0-PrereleaseTagHere).
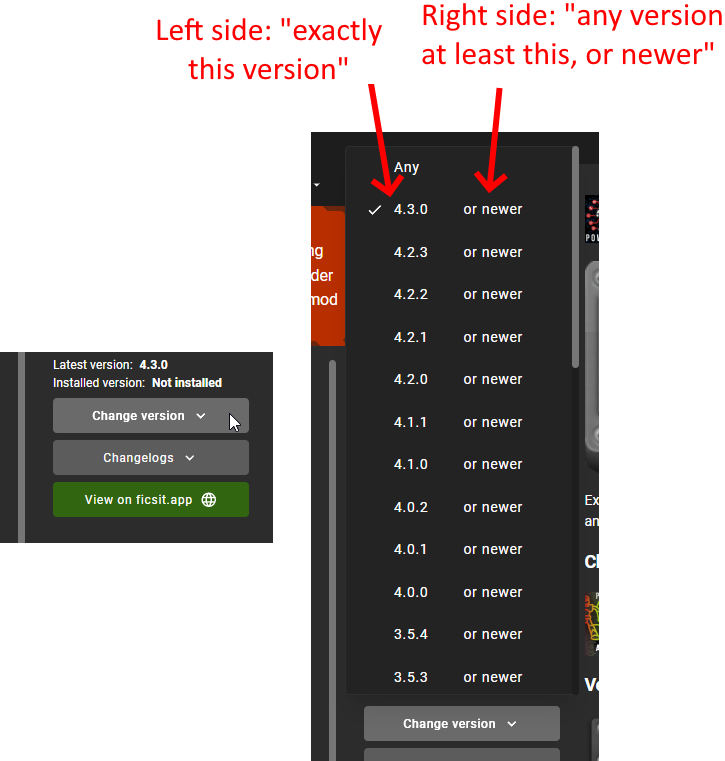
If you want to install a specific version of a mod, such as a prerelease version, click the mod’s listing to expand the description panel then click the "Change version" dropdown. Click the left side of an entry to lock to exactly that version. Click the right side of an entry to lock to that version or newer.
Troubleshooting
Answers to frequent questions and troubleshooting steps for using the Mod Manager can be found on the Frequently Asked Questions page.
Source Code
The Mod Manager is written with Wails (Go and Typescript), Svelte, and Skeleton, and is open source. You can find the source code on GitHub!