First Person Rendering with Panini Projection
Satisfactory’s rendering pipeline utilizes a vertex shader to render the pioneer’s arms and equipment correctly. Applying this same shader to your modded first person materials (equipment, trinkets, player models) is essential to ensure they line up correctly with the player model as end user Field Of View (FOV) settings vary. The effect should not be applied modded buildings, items, 3rd person meshes, or generally anything else because the game’s existing rendering pipeline already handles it.
The most convenient ways to apply the shader to your mod’s content are:
-
Making a material instance from a base-game material that already has supports it
-
Using the relevant material node in your own materials
Behind the Scenes
In Satisfactory, like many FPS games, first-person equipment is drawn in a special manner to avoid several problems, such as ensuring the pioneer’s arms and tools don’t clip into the environment when you get really close to things.
To limit visual distortions when the user is playing with a large FOV, a vertex shader called a Panini Projection is applied to the world and the player’s first person models. To learn more about this technique, see this article, which was originally linked from Unreal Engine documentation page about a different unrelated implementation of the technique.
Satisfactory always renders the player’s first person viewmodels with a fixed 90° FOV, so it’s best to work on these meshes at a 90°. This will minimize errors and let you get the best idea for how it sits on the screen, even in a modeling program.
Note that in game option "First Person FOV Modifier" adjusts the model’s scale, not the Camera FOV. There may be some math done to the parameters fed to the Panini Projection, but if you hook up everything right you won’t need to worry!
In-Game Appearance
You can tell a material is not set up properly if its position changes noticeably when the user adjusts their FOV.
The below screenshots showcase the appearance of ExampleMod’s example trinket at different "Field of View" game option values. The left side has the projection enabled, while the right side has it disabled.
Note that the model does not connect correctly when the projection is disabled at FOVs other than 90°.
| ✔️ Panini Enabled | ❌ Panini Disabled |
|---|---|
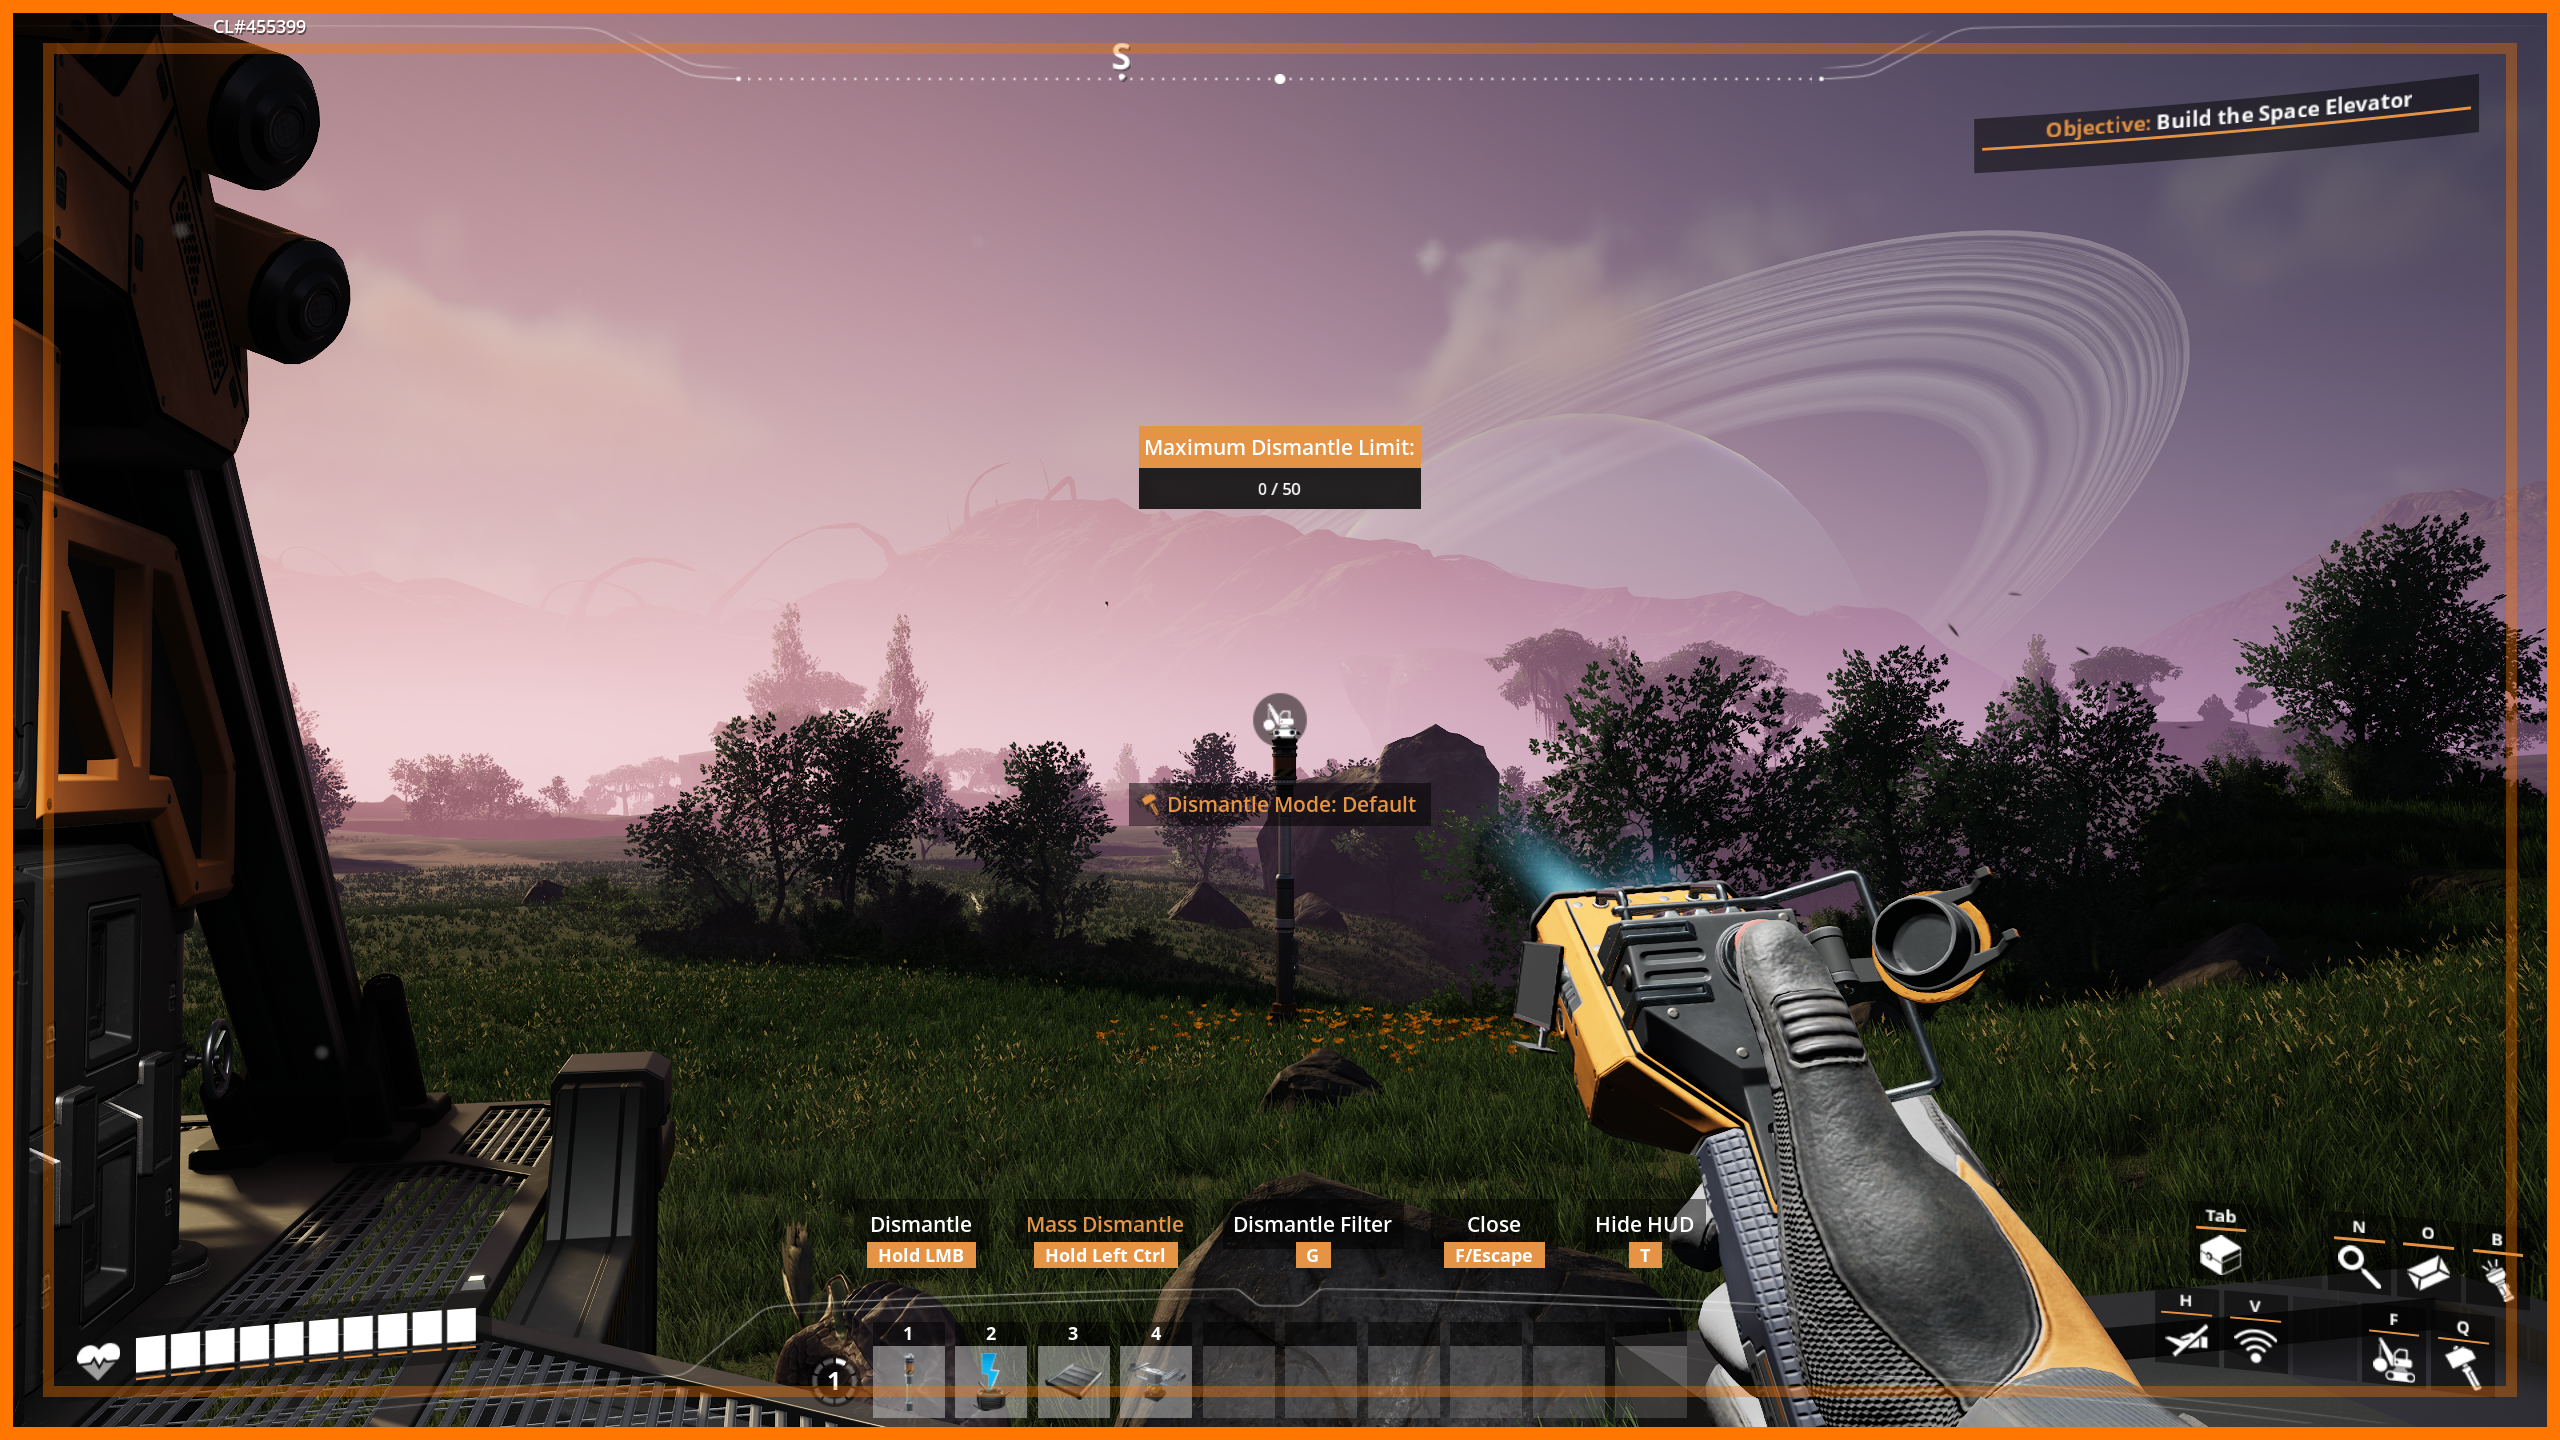
Figure 1. Enabled (70° FOV)
|
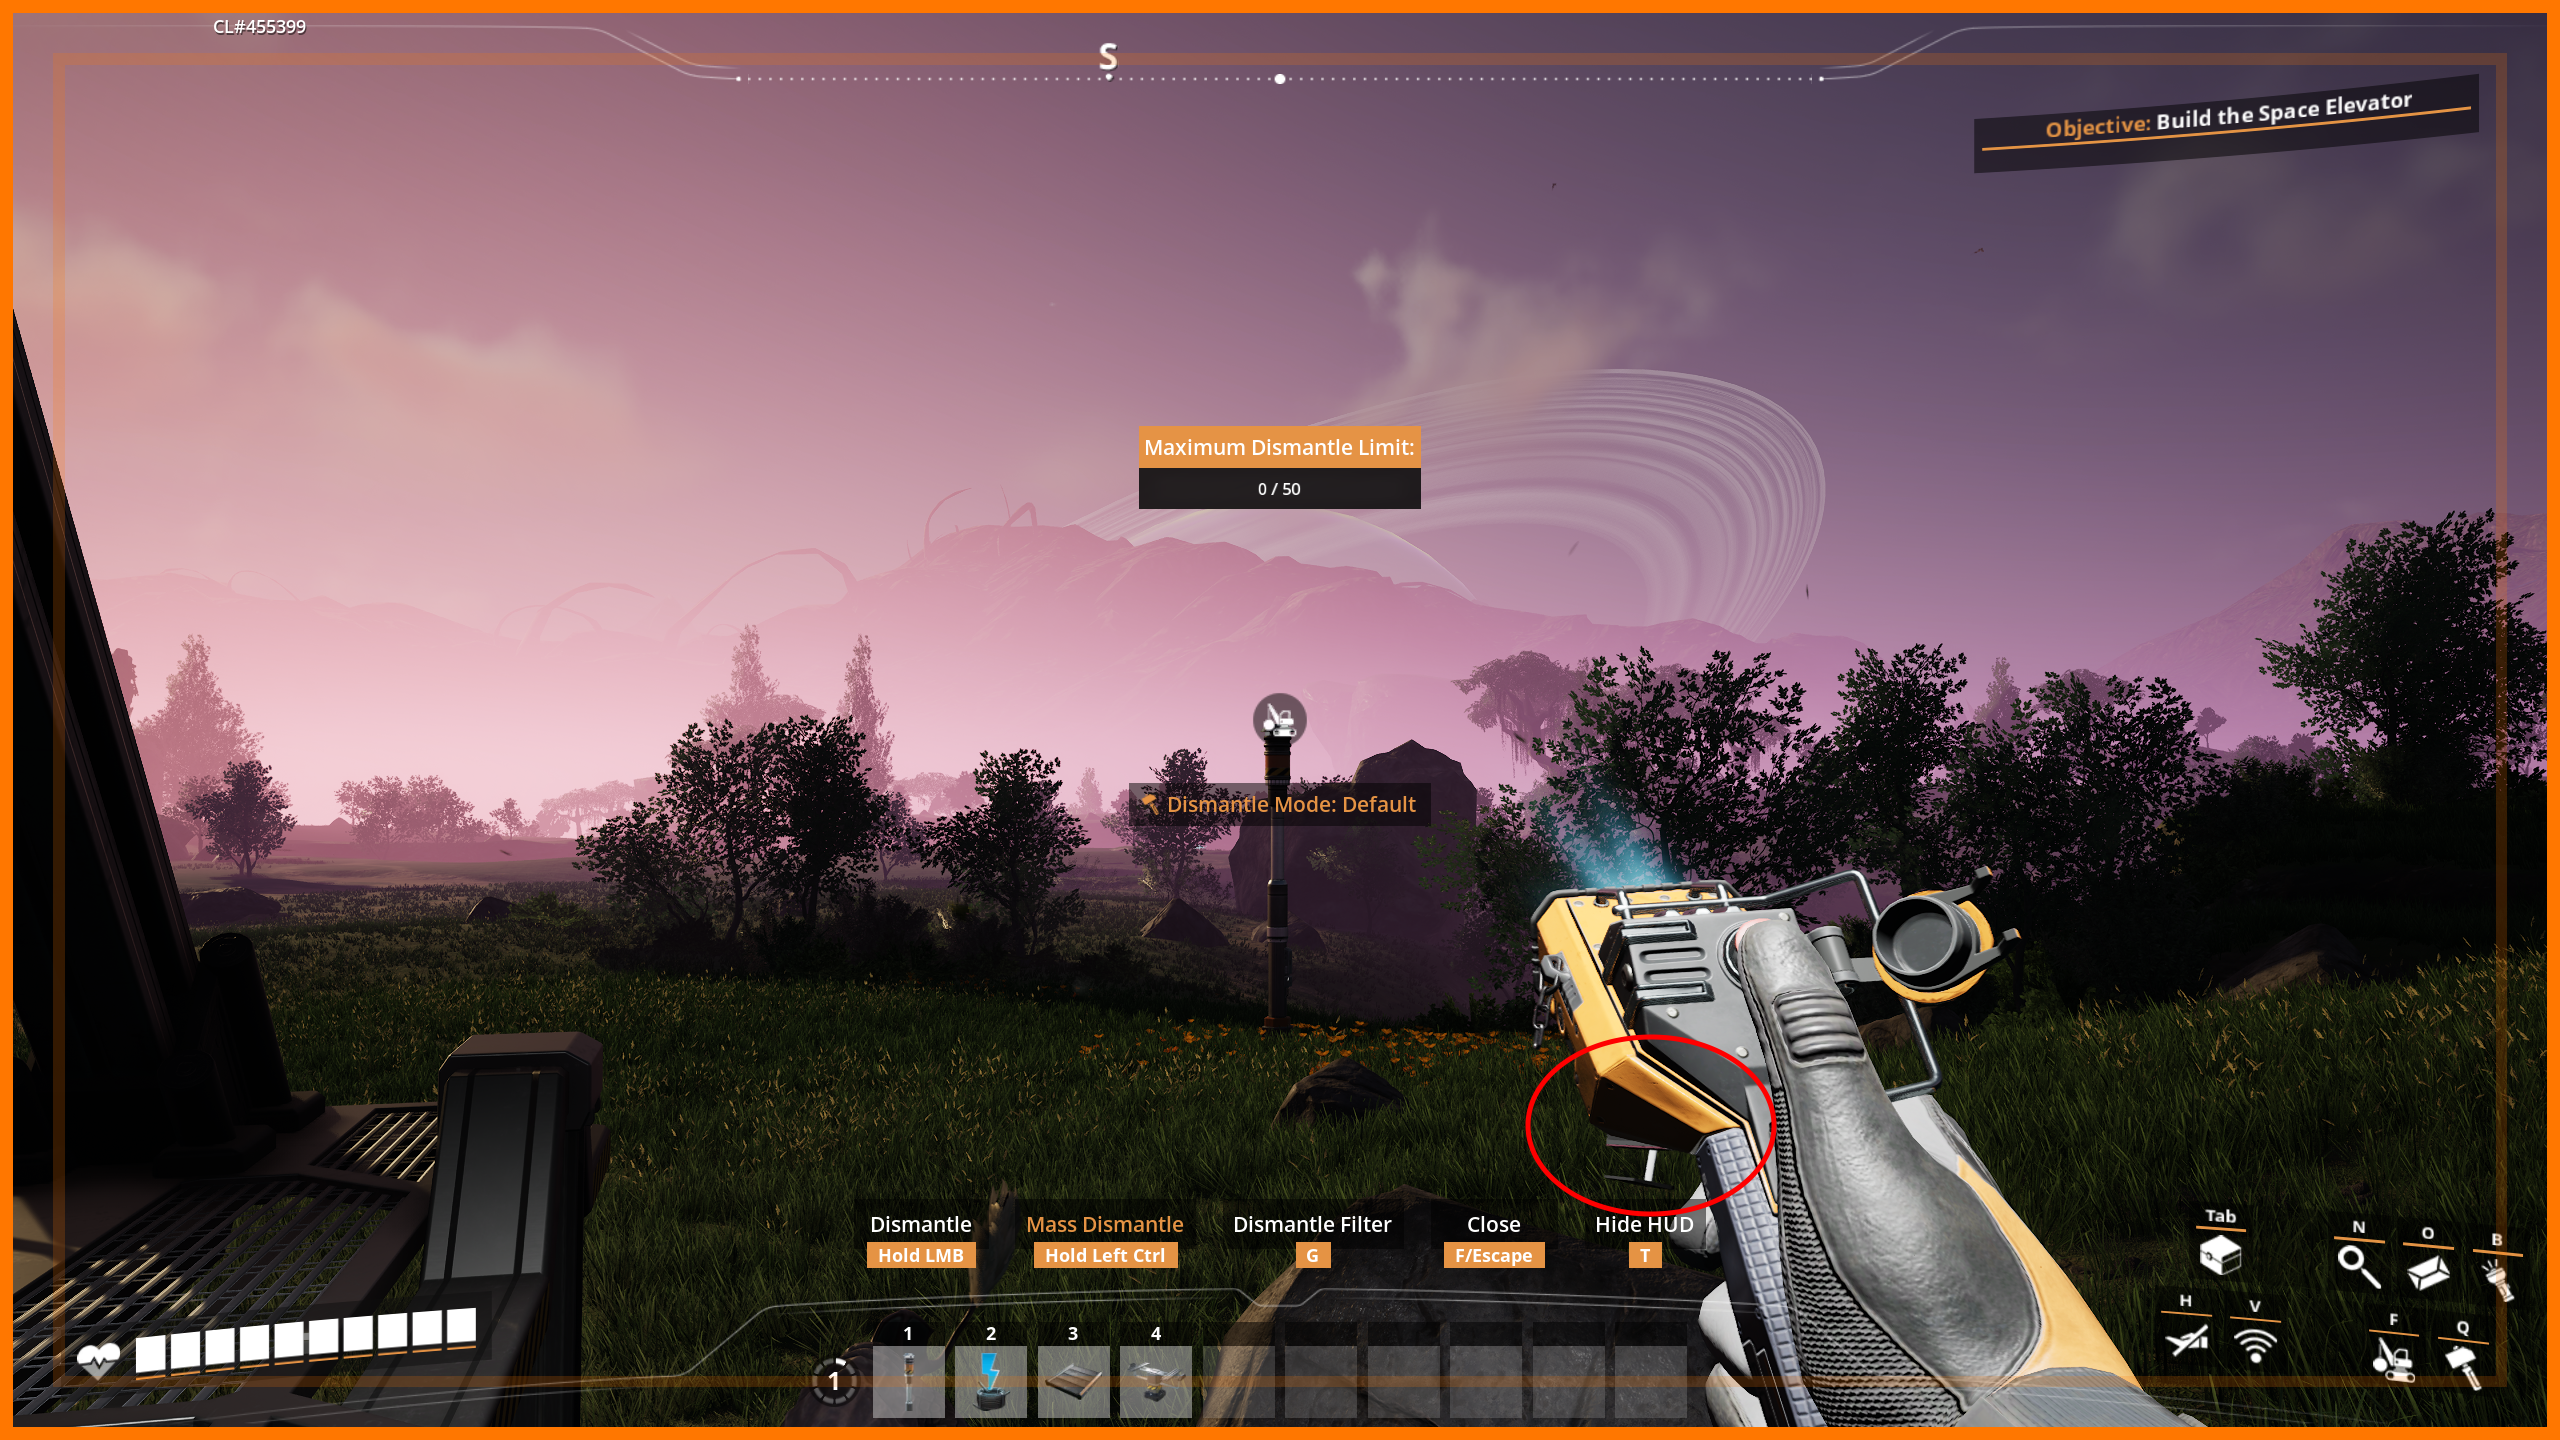
Figure 2. Disabled (70° FOV)
|
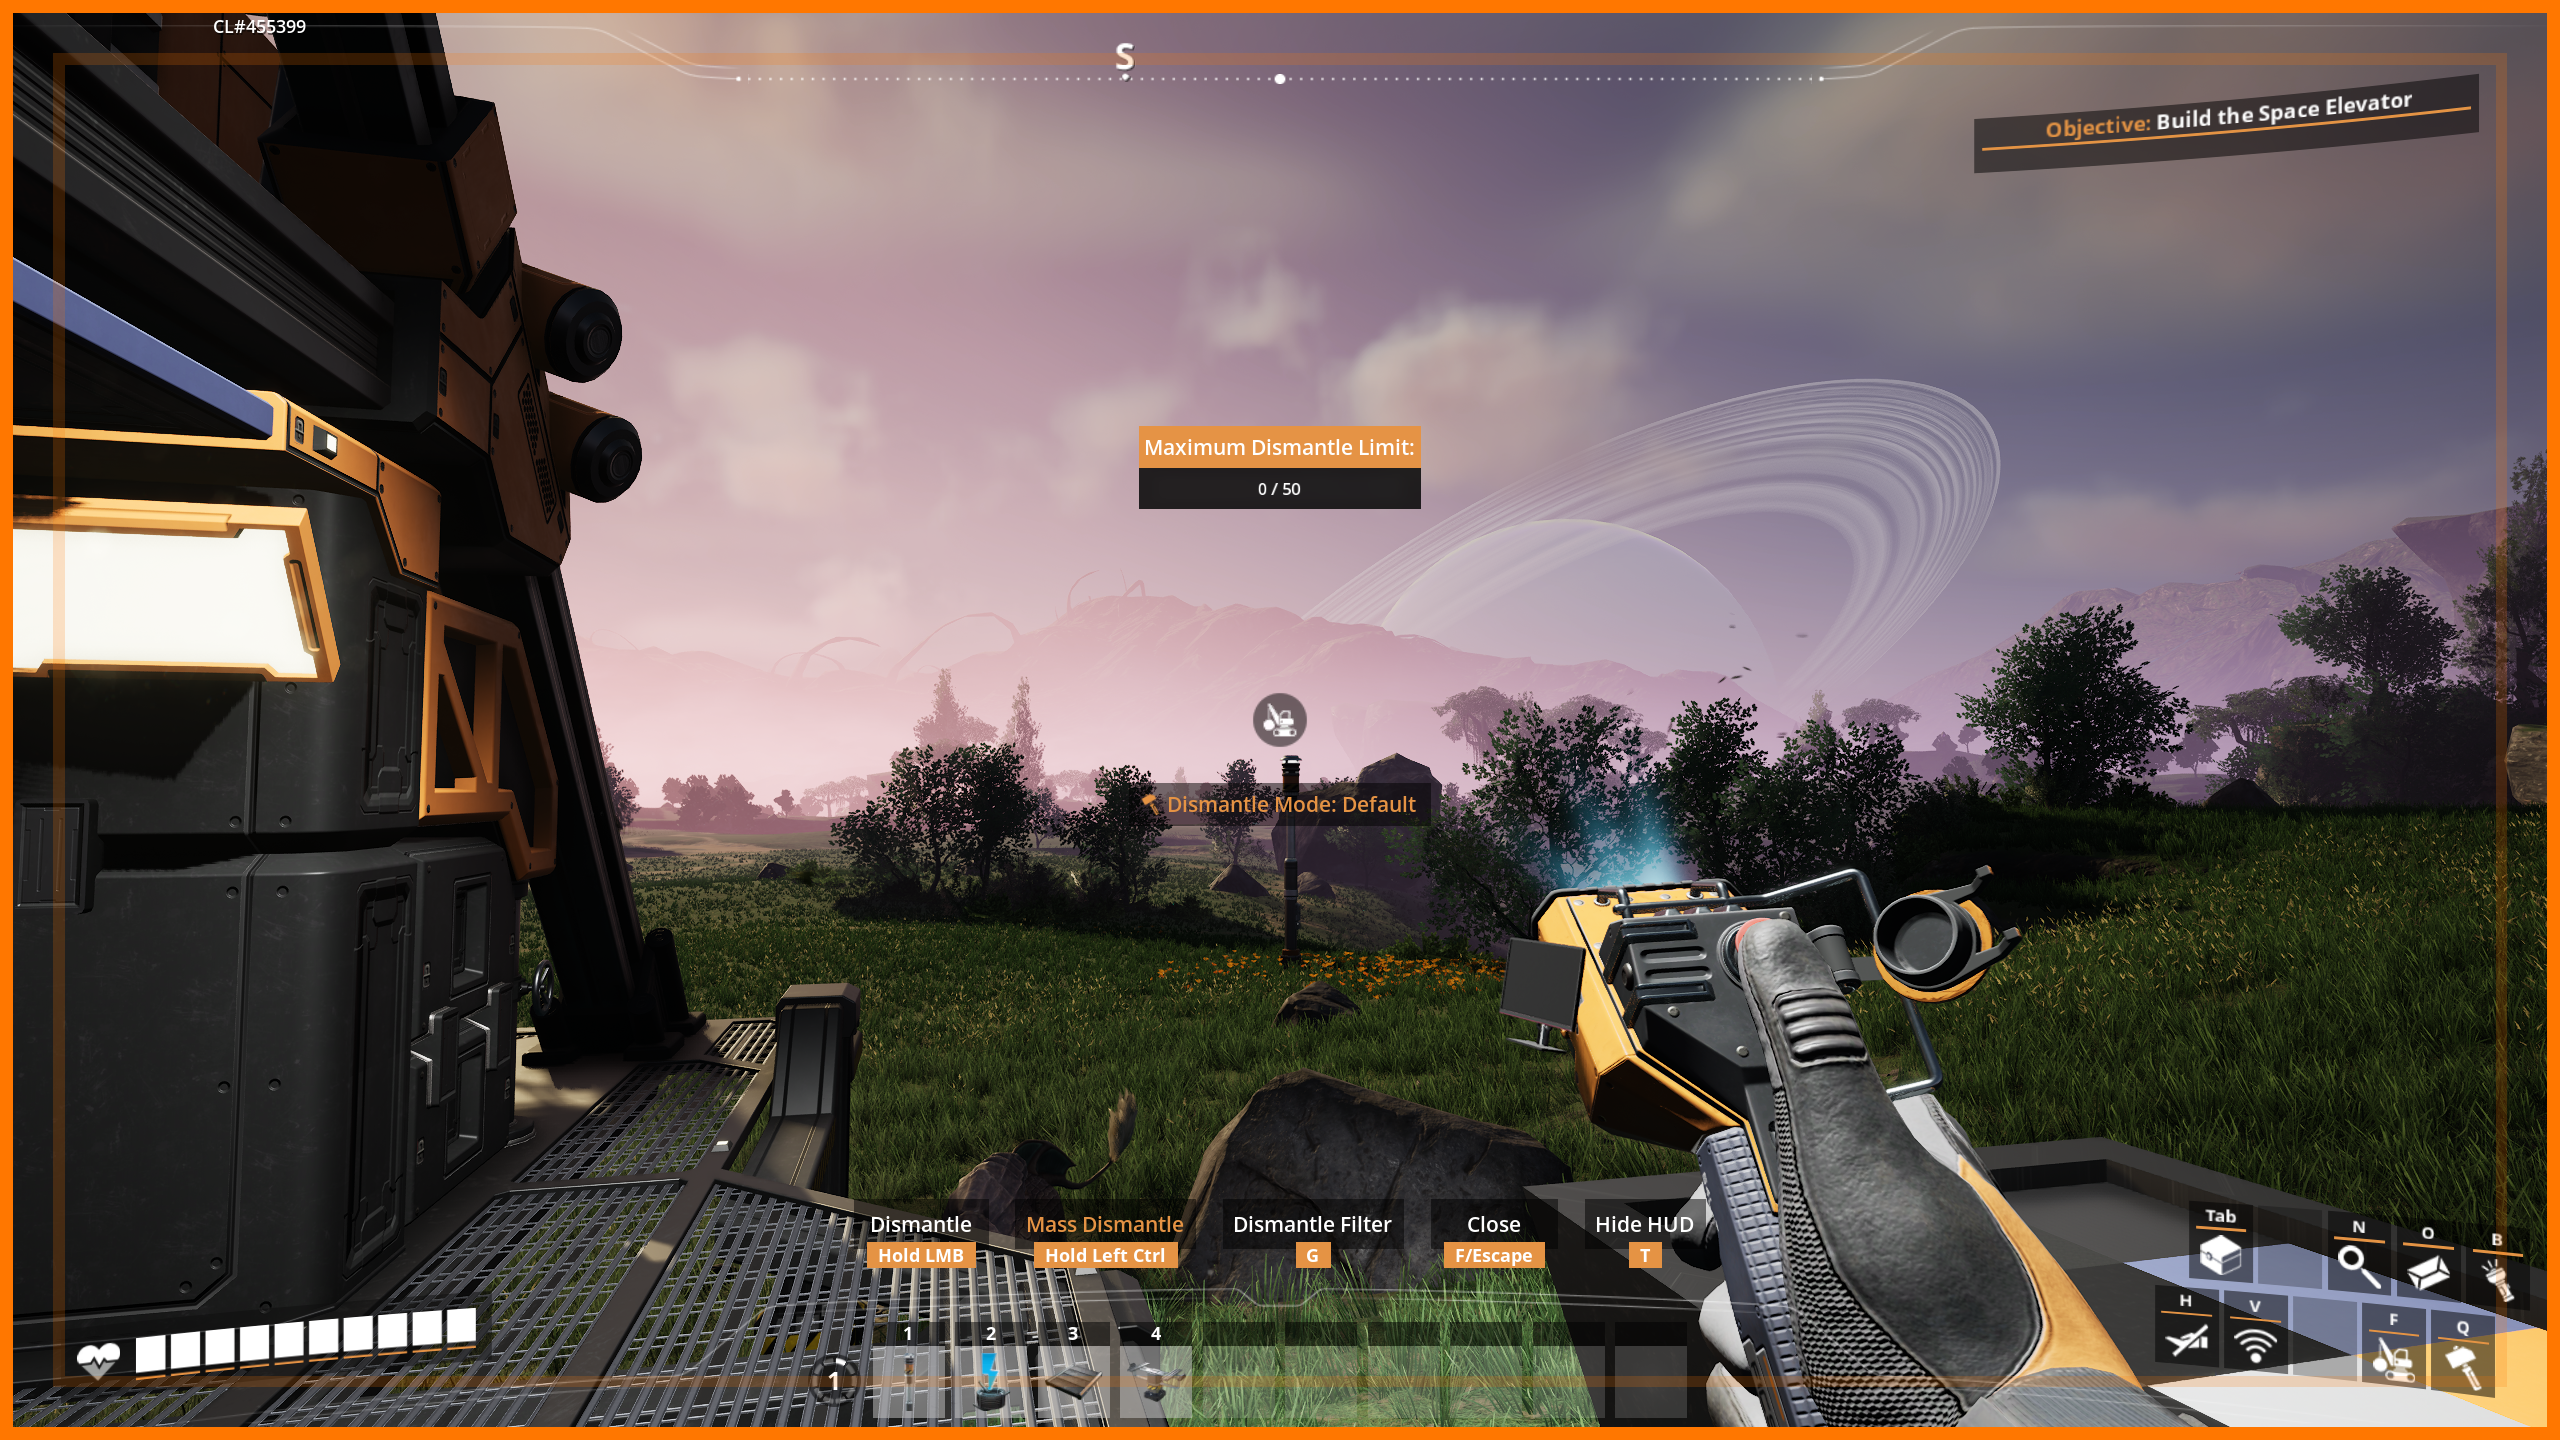
Figure 3. Enabled (90° FOV)
|
Figure 4. Disabled (90° FOV)
|
Figure 5. Enabled (120° FOV)
|
Figure 6. Disabled (120° FOV)
|
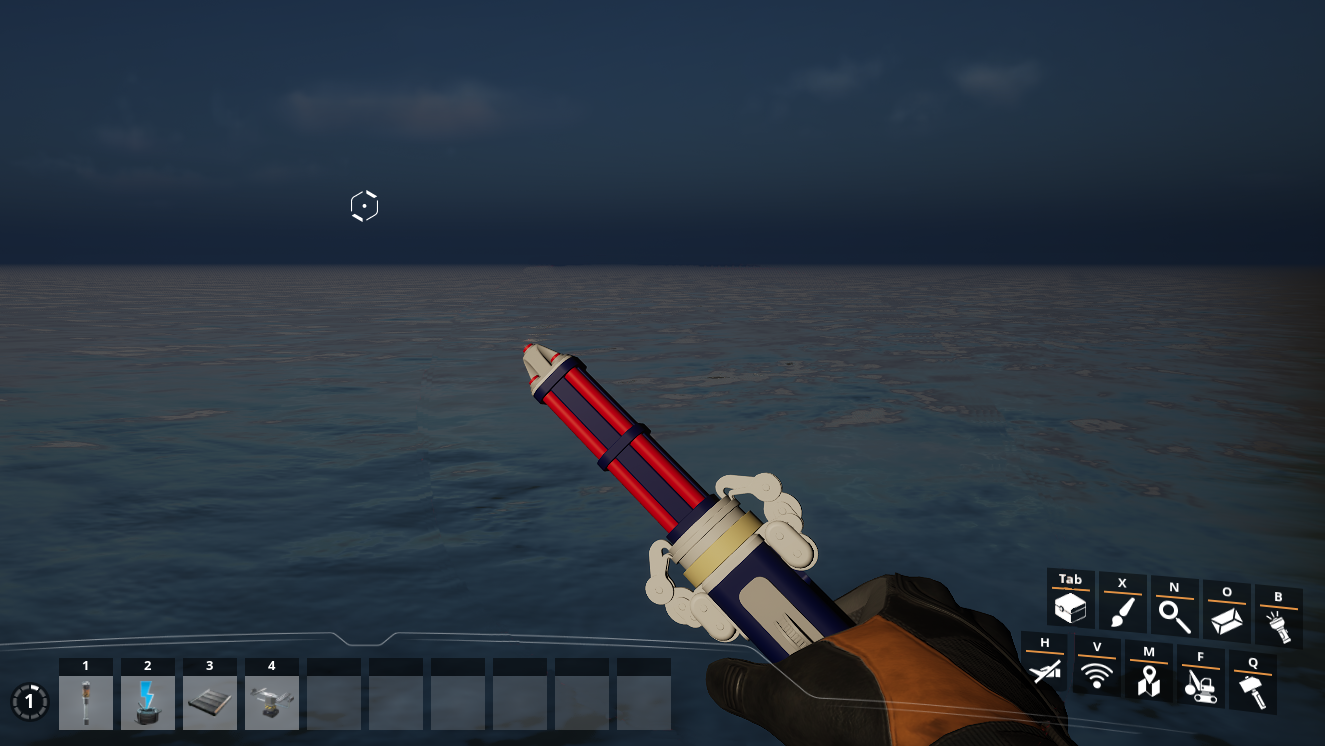
Figure 7. Modded equipment Enabled (90° FOV)
|
Figure 8. Modded equipment Disabled (90° FOV)
|
Reusing Base Game Materials
A number of base game materials already have Panini Projection support built in. You can create material instances from them to easily enable the effect on your modded content assuming the materials' other behaviors suit your needs. It can be enabled via their material parameters, usually called something like "UsePaniniProjection". This is the approach taken by Example Mod’s Example Trinket, Desc_Trinket_TvOfKnowledge.
Examples of base game materials that support Panini Projection include equipment and trinket materials, as well as MM_FactoryBaked.
For example, trinkets can use the Asset_Master material with the "UsePaniniProjection" option enabled.
Enabling Panini Projection on Custom Materials
|
Custom materials are expensive to render and complicated to set up. Use your new textures with Material Instances of base game materials wherever possible. |
Panini Projection can be integrated into custom materials in two main ways, depending on whether your material uses Material Attributes.
Use Material Instances to enable toggling the effect per-instance without recompiling the shader. This is particularly useful because the models of other players, and 3rd person view models or dropped items, should not have the effect applied.
For equipment items, you will probably need one instance with it on for first person, and one with it off for dropped items.
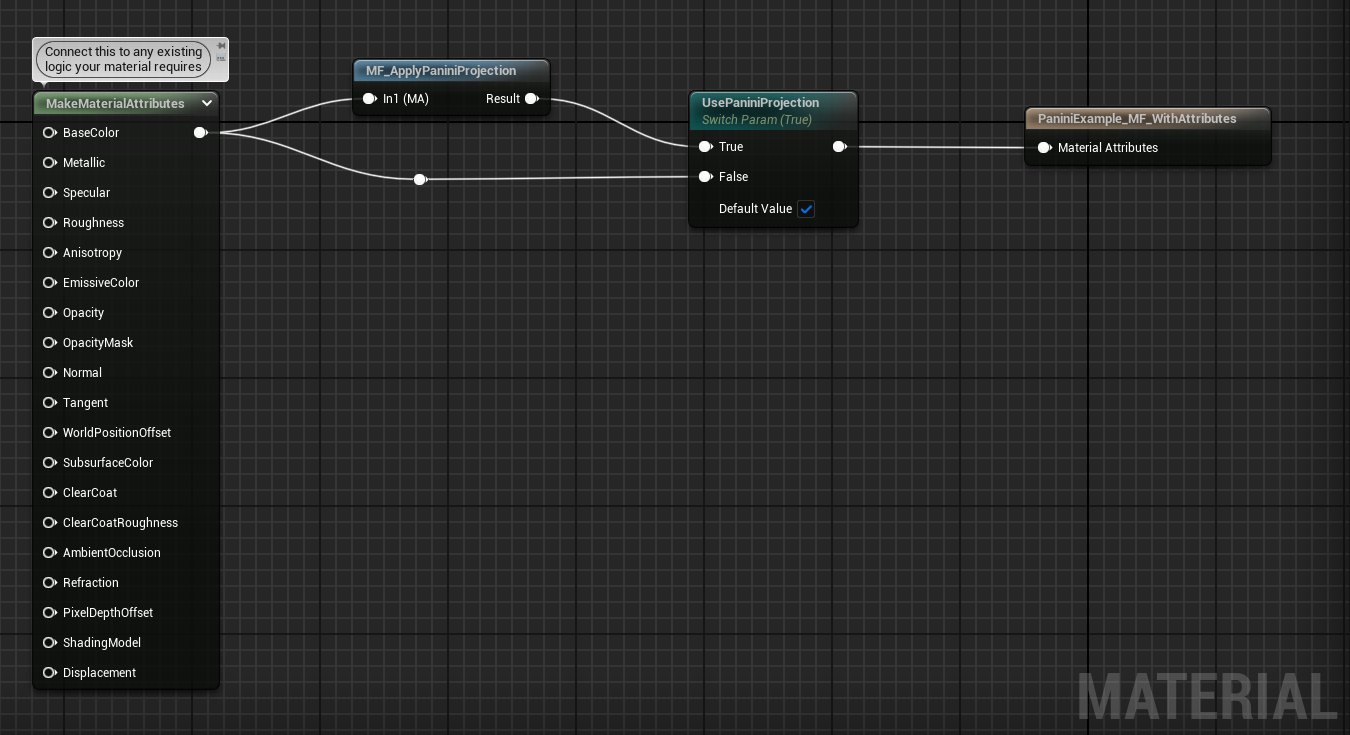
1. Using MF_ApplyPaniniProjection (Material Attributes workflow)
-
In your material’s settings, enable Use Material Attributes.
-
Add a new
MF_ApplyPaniniProjectionnode to the material graph. Ensure you did not accidentally use the one that takes parameters directly. -
Use
MakeMaterialAttributesto gather outputs from your existing material code. -
Feed the result into Apply Panini Projection.
-
Add a
StaticSwitchParameternode named "UsePaniniProjection" and set its default value to true. -
Connect the Panini Projection node to the UsePaniniProjection True input.
-
Connect the result of Make Material Attributes to the UsePaniniProjection False input.
-
Connect the result to the material’s Material Attributes output.
-
Create material instances as needed. Remember to set `UsePaniniProjection` accordingly depending on if the material is used in first person.
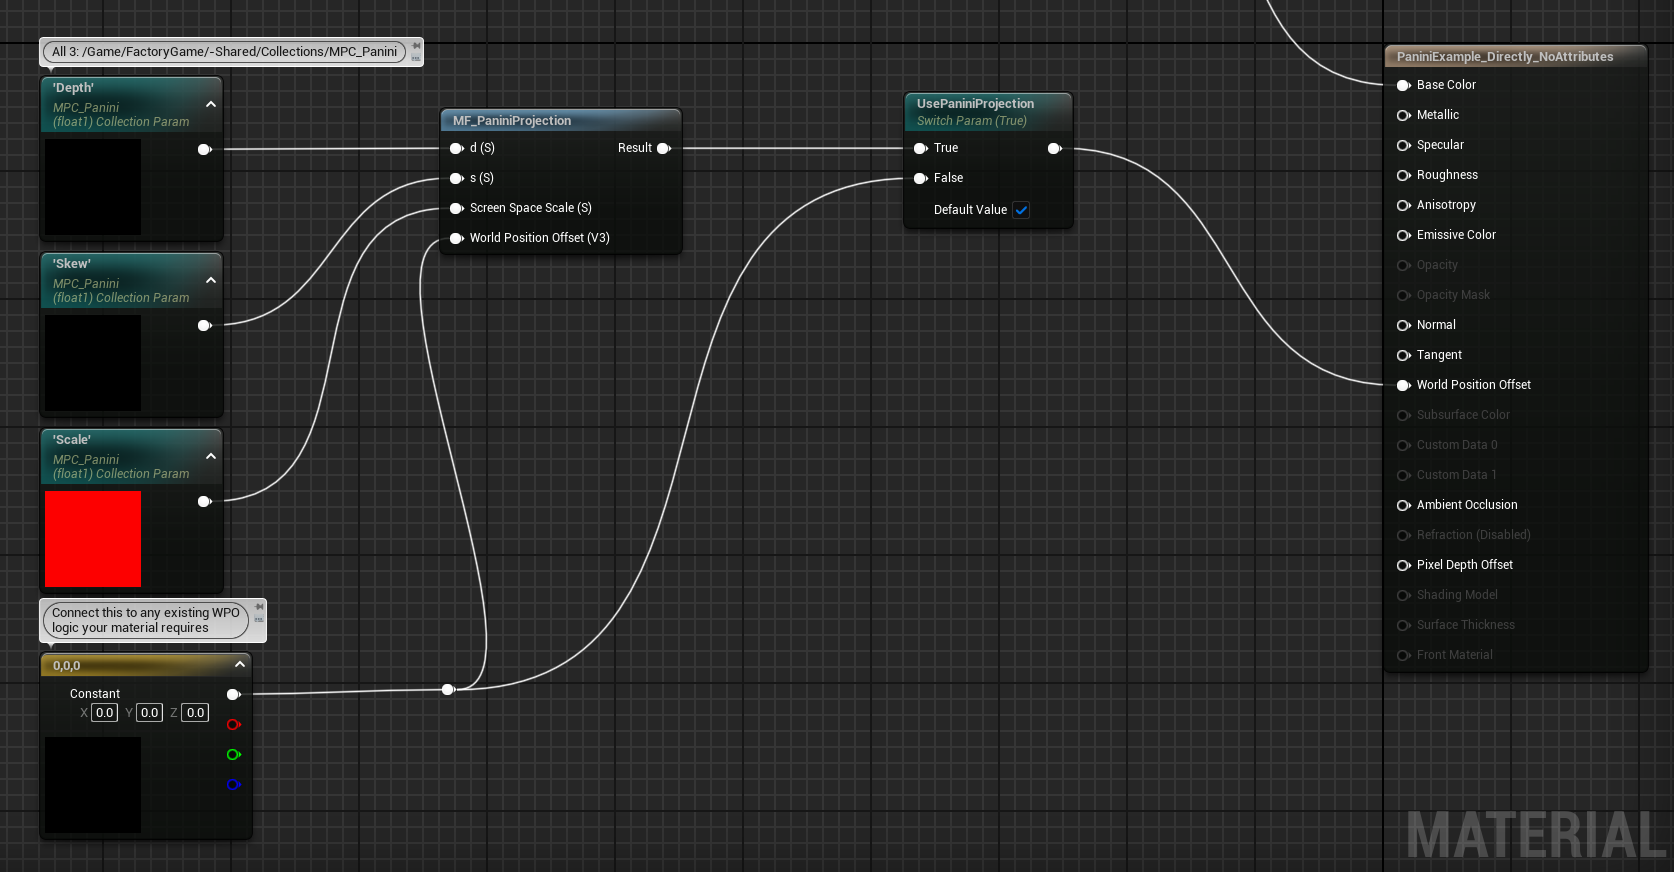
2. Using MF_PaniniProjection directly (non-attributes workflow)
-
Add a new
MF_PaniniProjectionnode to the material graph. -
Add 3
CollectionParameternodes to the material graph. They should all have the MPC_Panini collection selected (/Game/FactoryGame/-Shared/Collections/MPC_Panini). This ensures your material will use the nice values Coffee Stain has already selected. -
Select Paramater Names on the collection nodes and connect them accordingly:
Collection Parameter Name
MF_PaniniProjection Node Pin
Depth
d
Skew
s
Scale
Screen Space Scale
-
Connect MF_PaniniProjection’s World Position Offset to either your material’s existing World Position Offset code, or a Constant3Vector node of
0,0,0if you have none. -
Add a
StaticSwitchParameternode named "UsePaniniProjection" and set its default value to true. -
Feed the result of the Panini Projection into the UsePaniniProjection True input.
-
Plug a Constant3Vector node of
0,0,0into the UsePaniniProjection False input. -
Plug the result into your material’s World Position Offset output.
-
Do whatever else you were planning to do with the other material outputs.3
-
Create material instances as needed. Remember to set `UsePaniniProjection` accordingly depending on if the material is used in first person.