Create an Item
Now that you’ve created a custom recipe and schematic, you’ll want to create a custom Item. For this tutorial, we’ll make an item named 'Doc Item'.
Creating the BP-Class
The item system is a bit complex, but to summarize it, we simply need to describe our item in a FGItemDescriptor class.
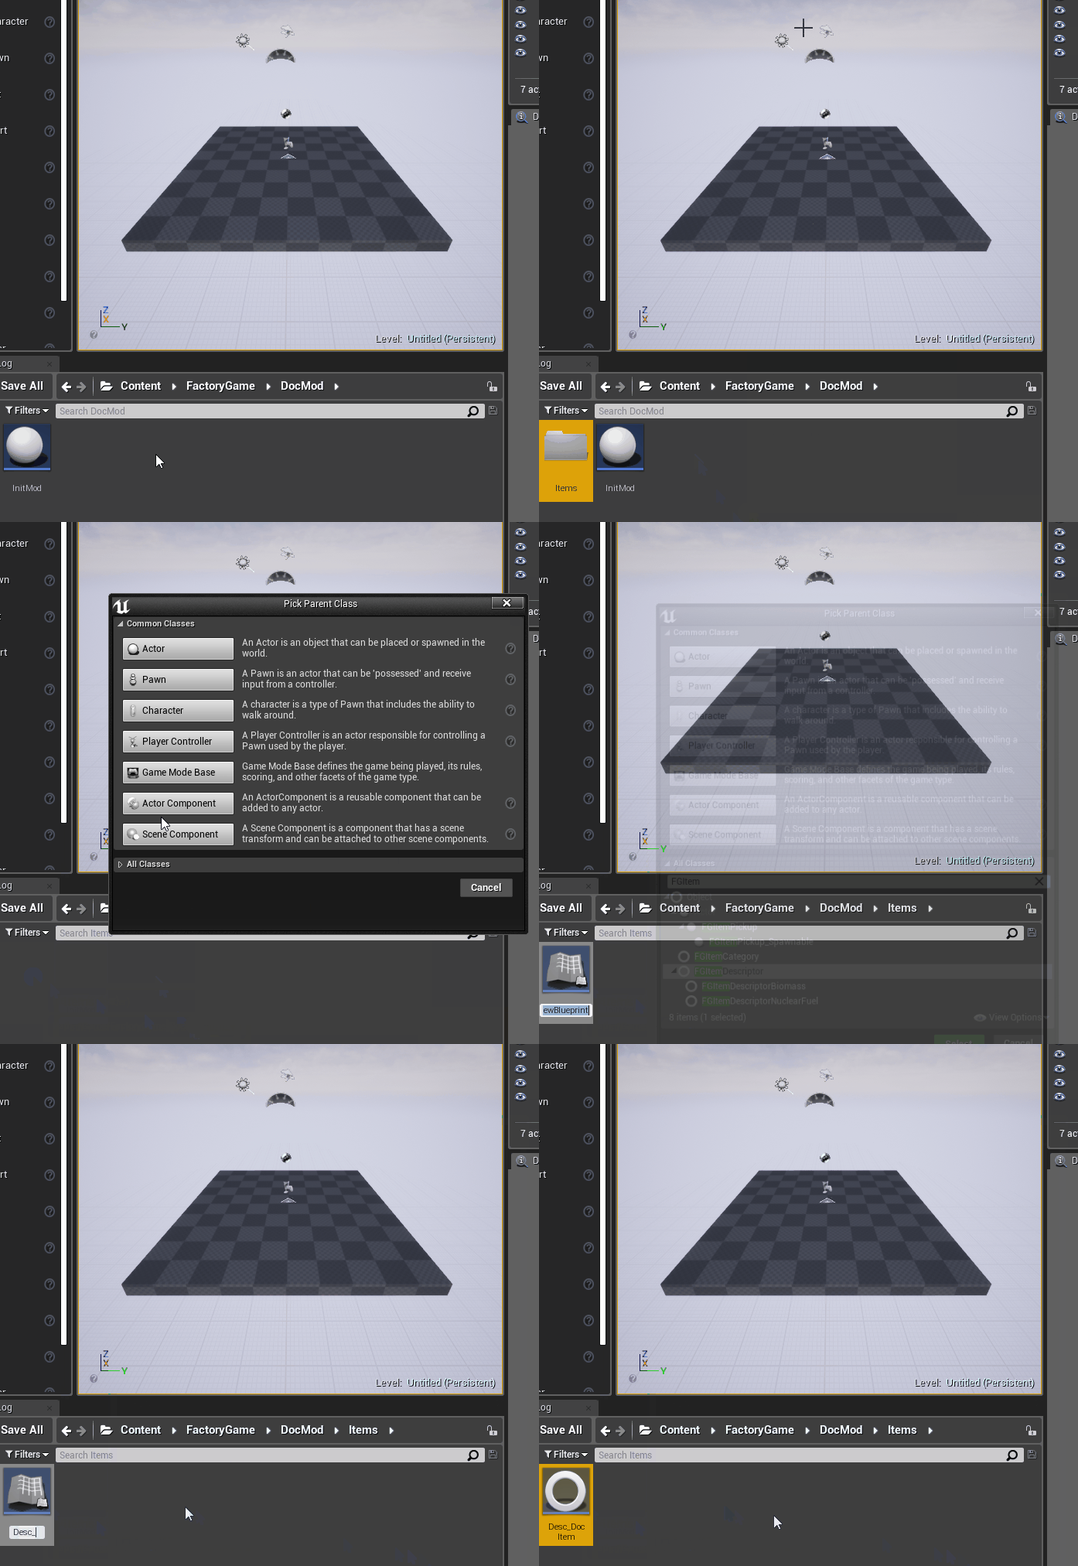
To create it, go to the content browser in the Unreal editor. Go to the Mod-Root +Content/DocMod/ and create a new folder and call it "Items" to keep with our organization pattern so far.
Then create a new Blueprint of type FGItemDescriptor in the folder. We’ll call it Desc_DocItem to follow Coffee Stain’s naming convention ("Desc" stands for descriptor).

Note: this gif is slightly out of date as of SML 3.0
Describe the Item
Open the class and you should see the default settings of the classes' attributes. If not, just click on "Default Settings" and they should appear in the settings browser of the class editor. In here you will find multiple attributes with the different properties such an Item can have.
-
- M Use Display Name and Description
-
Because we have just a simple Item we need to check this (set the boolean to true) so that the item name and description are used directly.
-
- M Display Name
-
The item’s name in game. We’ll set this to "Doc Item".
-
- M Description
-
Set this to a simple description of the item. In our case, we use the text "This is the starter Item of the Doc mod."
-
- M Stack Size
-
Satisfactory has hardcoded item stack sizes. Items can stack to either 1 (One), 50 (Small), 100 (Medium), 200 (Big), 500 (Huge), or 50,000 (Fluid). Go ahead and pick one as you see fit.
-
- M Can be Discarded
-
Whether it can be trashed using the trashcan icon on your inventory. AWESOME sink settings are handled elsewhere. We’ll uncheck it so that you can’t throw the item into the trashcan. Ficsit does not waste.
-
- M Energy Value
-
This value describes how much energy this item should release if it gets burned in a generator. Our Doc Item won’t be a fuel item, so it shouldn’t be able to get burned in any generators, so we’ll use 0.0 for that value.
-
- M Radioactive Decay
-
If set to a value greater than 0, the item will cause the player to take radiation damage. Values should not be greater than 1. We’ll leave this at 0 for ease of testing our mod.
-
- M Conveyor Mesh
-
As we know, all items have 3-Dimensional representations for when they’re dropped on the ground or on a conveyer belt. Items use the mesh you specify here when you’ve dropped them on the ground and for display on conveyors. We’ll cover this fully further down on the page, as setting it up to render correctly takes a couple of extra steps.
-
- M Item Category
-
This groups the item into a category, this affects where it shows up in the recipe list. We don’t need this so we leave it on "None", resulting in the item being categorized under "Other" ingame.
-
- M Small Icon
-
This is a simple texture image of the object used in the inventory to visualize what the given stack is. The recommend size is 64px for regular items, 256px for buildgun items. We have an image ready for use here. When using your own models, you can follow the tutorial here to generate icons that look like the ones in game.
-
- M Big Icon
-
This is the same as the small icon but can be higher resolution. The recommend size is 256px for regular items, 512px for buildgun items. Let’s just use the same icon file as before for simplicity.
Make the Item Work on Conveyors
In order to avoid having your item display as the default flat white cube when on a conveyor or when dropped in the world, you must specify a Conveyor Mesh. We have an example model and textures you can use here. Import these the same way you imported the category image in the Recipe vs Schematic tutorial. Put them in a Folder together somewhere within your plugin folder. Open the MREO texture we’ll use for the Reflection map and turn sRGB off. Next we’ll need to make some materials to use these textures, we have to make them ourselves not import them otherwise they wont render properly on belts.
Like many of the more complex parts of the game, this process has its own article to help you: Conveyor Rendering. If you’re unsure about how to create material instances or assign textures, check out this external video tutorial. Do not try to edit the Master Material as any changes will not show up in your mod and it is already accurate to game content.
|
If you don’t want to make a custom mesh for items you create in the future, consider reusing the mesh of a nondescript base game item, such as the HUB Parts, as opposed to leaving it as the default white cube. |
Make the Item Available
The item is available to the user when it gets loaded at least once. Because Unreal loads assets with a just in time method, we somehow need to force the asset to be loaded. One way we can do that is by having our item used in a Recipe. Conveniently, we’re already planning to have the item be usable in a recipe so that the player can obtain it. Change the outcome of our already created recipe to this new item, or create a new recipe for it if you’d like to practice that.
And you’re done! Go ahead and Alpakit and check out your fancy new item in game.