Plugin Setup and Init Game World
To get started with our mod, we’ll need to make a new Unreal plugin. Every mod you make should be a separate Unreal plugin.
Unreal Plugin Creation
Since SML3.0, mods are now Unreal plugins, and their loading is handled by Unreal itself.
First off, we’ll need to create the Unreal Plugin for our mod.
You can do this by clicking
Edit → Plugins → New Plugin → Content Only Plugin in the Unreal Editor.
The name of your plugin must be your mod’s
Mod Reference.
For this documentation example, you can use DocMod as the mod reference.
When you start on your own mod, you will have to create a new plugin
with a mod reference other than this.
|
Be sure to read the notes on Mod References if you have not yet done so. It is critical that your mod reference follows these format rules. |
You can fill out the Descriptor Data, or leave it blank, as we can edit that later.
Leave "Show Content Directory" checked and press Create Plugin.
Your new plugin should now appear at the bottom of the plugins list in the Project > Other category. Hooray! You might have to scroll a bit to find it.
Next, click Edit… to edit more of your mod’s plugin settings.
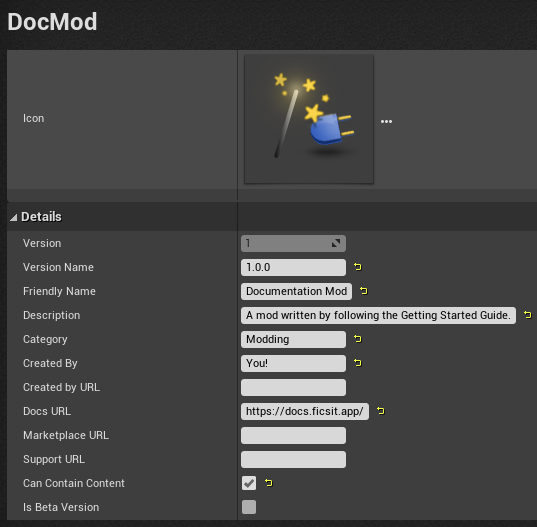
Here, you can fill out some additional details for your mod.
Since we’re working on an example mod right now,
most of these fields are not relevant to us.
You should be sure to set Category to Modding
and Version to 1.0.0,
which sorts your mod to appear with other mods
in the Modding section of the Plugins list.
Note that if you give your mod an icon image here, you’ll have to follow a few extra steps for it to show up in game.
These fields will be explained further when you prepare to upload your mod for others to use.
Creating your plugin will create a plugin workspace folder under <project>/Plugins/<Mod Reference>.
You might need to click on View Options → Show Plugins Content
in a Content Browser to view the contents of your mod in the Unreal Editor.

You can find your mod in the <Your Mod Reference> Content
subfolder of the Content Browser root folder.
This folder is where you will be putting most of the assets (models, blueprints, textures, etc.) that your mod uses.
|
If you want to Open Source your mod,
or simply want to use a version control system like Git,
the mod’s plugin folder (containing the Using version control is essential for collaborating on a mod with others, it helps write patch notes when you release an update, and you can use it to go back to previous versions of your files if something breaks. If you work on multiple mods, you only need one full project setup (which can be the cloned SatisfactoryModLoader repository) and each mod that you make will be a plugin in this project setup. The plugin’s folder would be the version control repository for that mod. |
Create Game World Module
Now that we’ve created our plugin,
we must create a starting point from which everything else gets invoked.
If we don’t have one, then our mod’s content will never be added to the game during loading!
In our case this is the InitGameWorld Blueprint, which is a Game World Module.
|
If you’re interested learning about the other types of Modules and how the content loading system works, you can read more on the Mod Modules system page. |
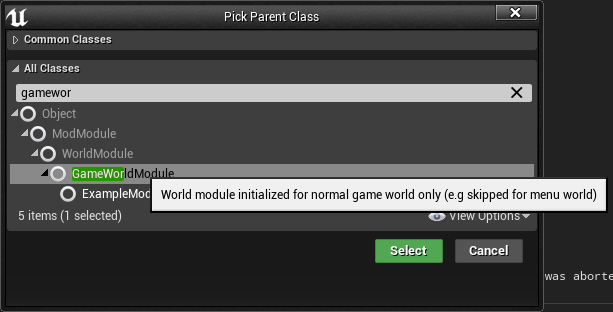
Within your mod’s content folder,
right click and select Blueprint Class under Create Basic Asset.
Click the triangle to close the Common Classes section,
and click the other triangle to expand the All Classes section.
Start typing GameWorldModule into the search box.
Once it comes up, select it and press the green Select button to create the blueprint.
Name it InitGameWorld.
You will be able to register recipes and other content from this module.
Next, double click on the module to open up its blueprint settings.
To make sure that SML automatically detects and loads our InitGameWorld, we must be sure to mark that it is the Root Module.

If you’d like to learn more about root modules, you can read about it on the Mod Modules system page. Otherwise, let’s get on to creating our first modded content - a custom recipe!