Simple Interaction GUI
Let’s create a simple interaction GUI for our Simple Machine. We’ll use it to read the current data and to reset the counters.
|
A completed version of this interaction GUI is included in the ExampleMod in the starter project. Check there if something is unclear or you get stuck. |
The Widget
The very first thing we do is to create the GUI itself. You do this by creating a new BP-Class of type Widget_UseableBase.
This works like every other regular UMG widget, so be sure you’re familiar with how they work.
In our case we’ll add two TextBlocks, and a button with a TextBlock in it which has the label "Reset".
|
You could cast the |
Bind the content of two new TextBlocks to individual functions. One of them should return an appended text of "Count: " plus the itemCount of the machine. The other should return typeCount and "different Types". Place them wherever you want.
Now we have the display of our text, but we still need to add the reset functionality.
For that bind a event to the on click event of a new button. Set both counters of the machine to 0.
There’s still a problem if you use the machine, the user can’t physically interact with the widget. The reason is that we don’t capture any input from the user. To fix that you’ll need to change some of the class default values on the widget.
-
- Block Movement
-
Activate this so the widget consumes keystrokes, meaning it can use them to trigger events. An example keystroke would be pressing
Escto exit the widget.
-
- Block Mouse Look
-
Activate this so the widget shows the mouse cursor and receives mouse input, allowing it to react to events like On Click.
Retrieving Information from our Machine
FGInteractWidget, the parent class of Widget Usable Base,
offers the M Interact Object field which represents the object that the player interacted with - in our case, our machine.
This field is a plain Object, which is good in this situation - by keeping the field type so general, it allows us to use the widget with pretty much any object.
Whenever you need to access data from the machine for display in the UI, you’ll have to cast the object to the relevant type. In this case, the correct type is the Buildable of our machine that we created earlier. Once the variable is casted, we’ll be able to access the fields on our buildable.
Make machine interactable
Now we need to attach our UI to the simple machine.
There’s very little to do, we just need to enable M Is Useable and set M Interact Widget Class to your newly created widget.
Done! Now you can interact with your machine by looking at it and hitting E.
Use the SF Window
You can make your widget look more like the other Satisfactory interface by using Widget_Window_DarkMode.
This base-game widget is provided with the modding starter content.
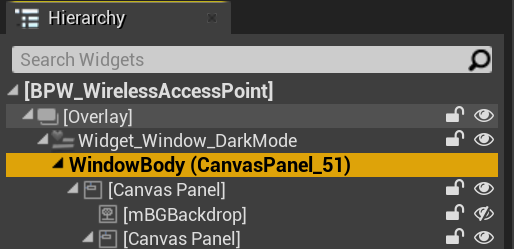
It can be used like most other container widgets - put the content you want into its "Window Body" widget slot.
You can set the window’s title by assigning mTitleText in the widget’s details.
|
Most of the time you will add a Canvas Panel and in it other widgets, so you can use it like a "normal" widget. |
If you want to add the functionality to close the whole interact widget by clicking the "X" Button,
not just the the window,
you need to bind the OnEscapePressed Event of the interact widget (or custom stuff) to the OnClose Event on the WindowDark.
UI is hidden in the editor using the Window Dark widget
If you start using the Widget_Window_DarkMode inside your custom Blueprint Widget,
you could see everything covered by a gray overlay,
which effectively blocks you from previewing the UI in the editor.
This is expected and doesn’t change even with a full asset dump.
There are two primary ways to deal with this problem.
Edit the Widget Asset
If you’d like, you can open the Widget_Window_DarkMode widget in Unreal Editor and hide the gray layer.
This change will not affect the game, just your development environment, since the asset you’re modifying will not be packed.
After opening the widget:
-
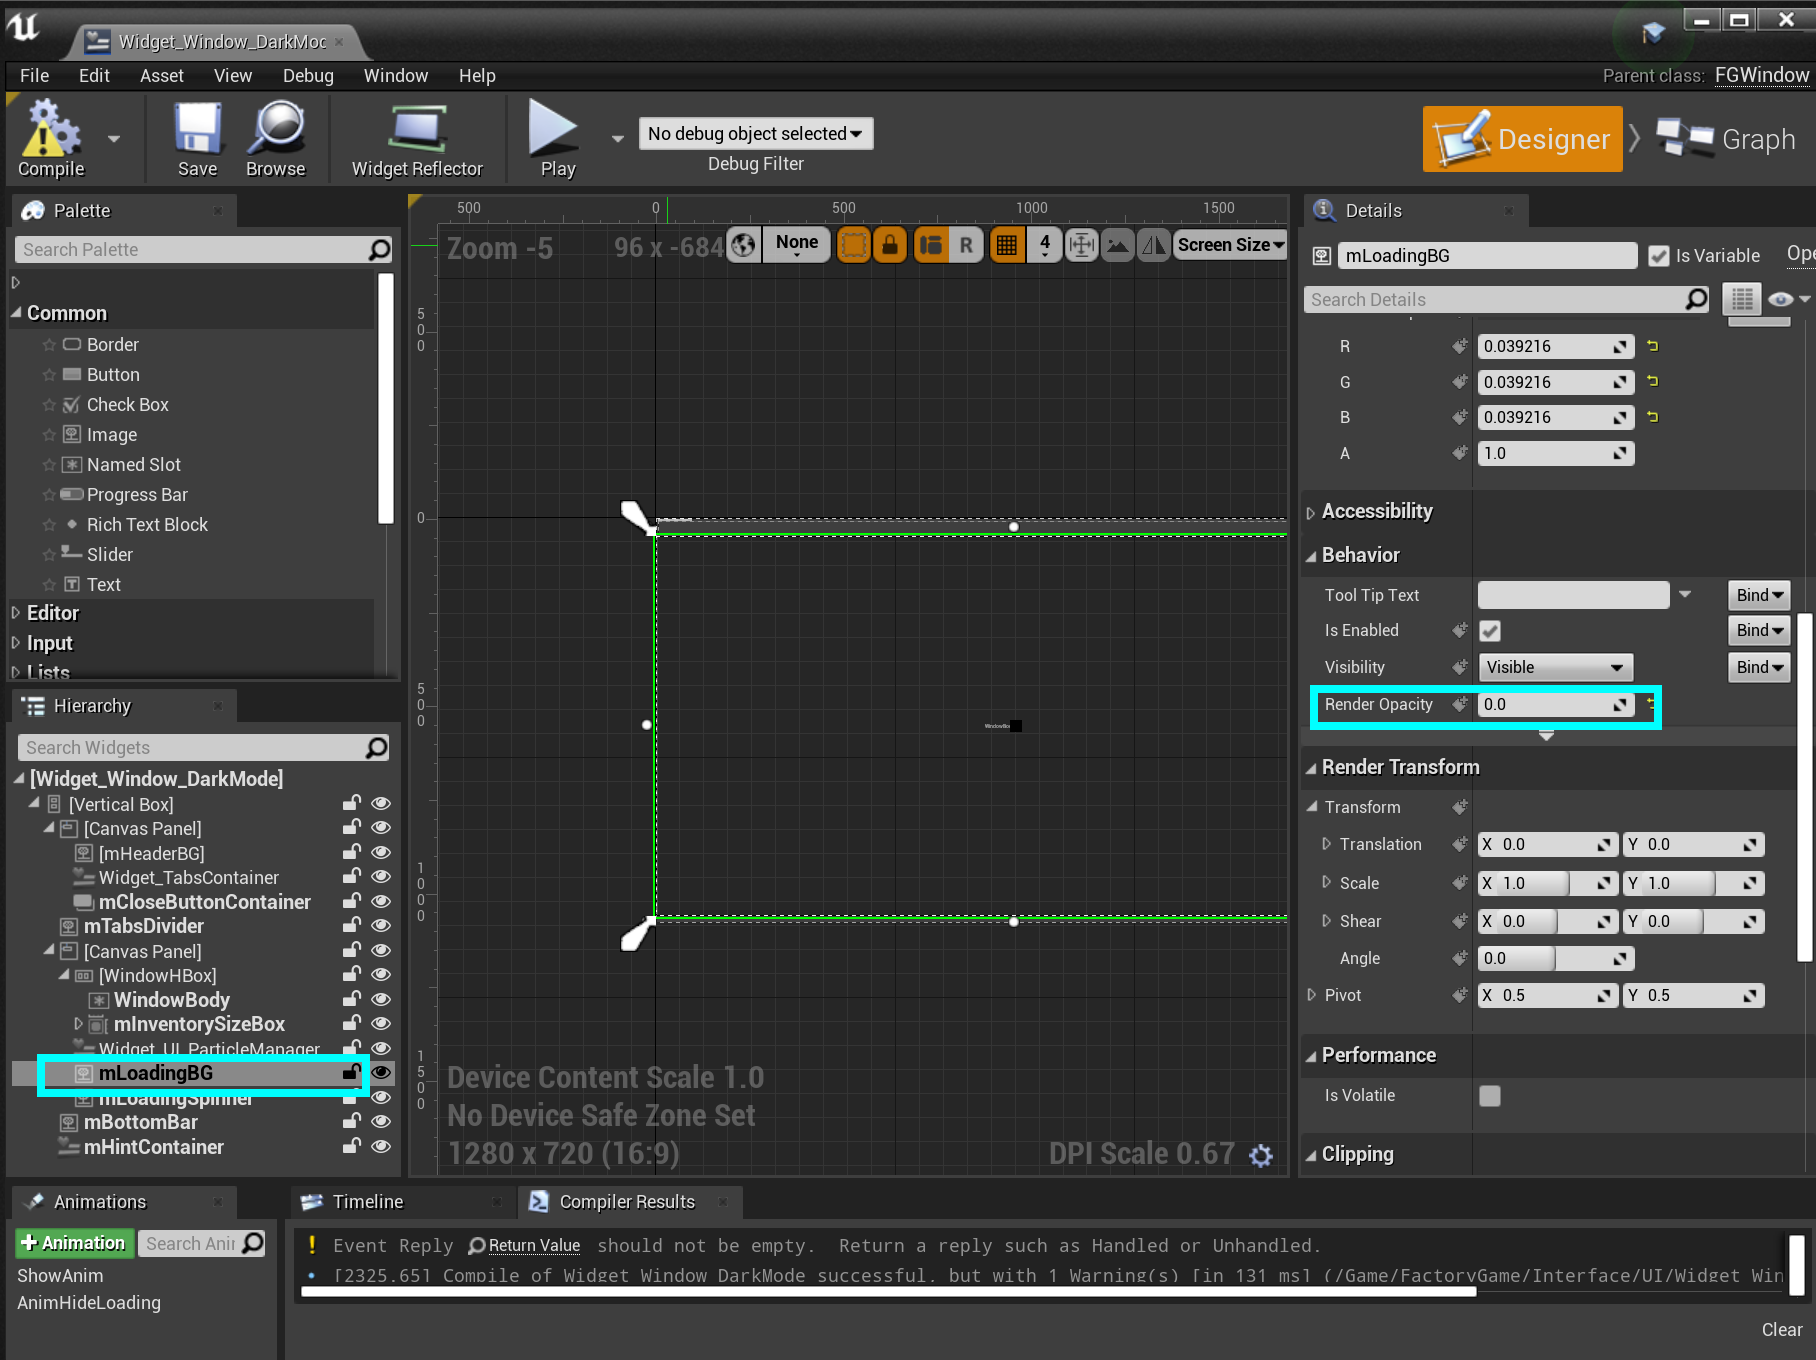
Locate the
mLoadingBgimage widget in the Hierarchy panel, then click on it. -
In the right "Details" window scroll to "Behavior" → "Render Opacity" property
-
Set it to 0.0
-
Click Save & Compile in the upper left editor window
Now you should see the content inside your widget. See the following image as reference for the steps.
|
If the original uasset get updated in the SML repo, you’ll have to redo this edit in your project. Same thing happens if you’re using a clone/fork of the SML project. This will effectively revert your changes. |
Use Pre Construct
Alternatively, if you don’t want to modify the widget, you can take advantage of the Pre Construct widget function to modify it before it’s displayed in the editor.
The Pre Construct function has a lot of utility outside of this, but that is outside the scope of this docs page.
We’ll be using it to set the Render Opacity (transparency) of the gray box and its loading icon so they don’t show up in the editor for us.
To do this, set up the following blueprint code in your widget. Notice that the Set Render Opacity call has multiple items connected to its Target pin - many widget functions support this feature. The blueprint node will apply the change to all connected targets.
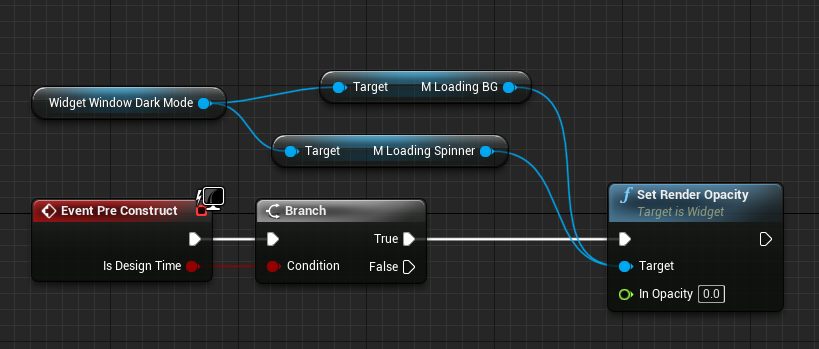
This 'fix' only takes effect for this particular widget - you will have to use this snippet again in each widget you create that contains a WindowDark.
Next Steps
You’ve reached the end of the getting started guide - congratulations!
If you’re still looking to learn about a specific concept, check and see if we have a page on it in the other sections of the documentation.
You can also ask questions on the Discord Server.
You may also be interested in C++ modding, which allows modifying and creating much more advanced game behaviors. More info can be found on that here.
Once you have a mod you’re ready to upload, follow the Releasing Your Mod directions to export and upload it for other people to use.