Item Counter Machine
In this chapter we’ll create a machine which simply counts the items and types of items that pass through it, outputting them again on the other side.
|
A completed version of this machine is included in the ExampleMod in the starter project. Check there if something is unclear or you get stuck. |
Create the Machine
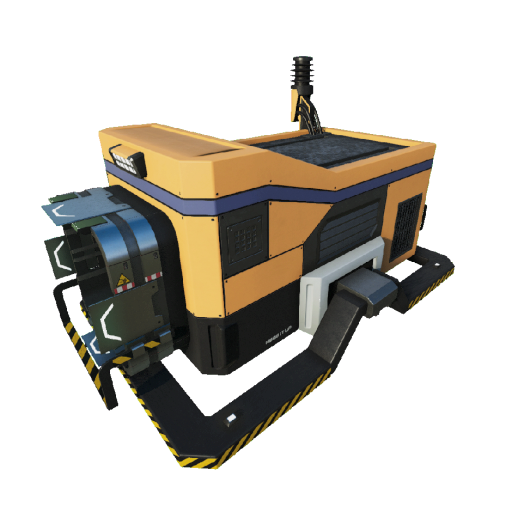
First thing to make our counting machine, you’ll need to create another buildable with a descriptor and recipe. This time use this as the mesh and this as icon so that it looks a bit more like a machine and less like a planter box.
Upon opening up the imported mesh you’ll notice that it has 3 material slots unlike the Plantpot of Knowledge’s singular slot. Most buildings have 3 or more material slots for reasons explained in the Modeling Guide.
Assign the MI_Factory_Base_01 material to the first slot,
the DecalColor_Masked material to the second slot,
and the Decal_Normal material to the third slot.
As this is a simple counting machine we’re using FGBuildable as our base class; however, if we were making a machine that produces or mines things we should look for a better starting point in the available classes. For now, to make sure we’re looking at the same thing during the tutorial, stick to FGBuildable.
Now we simply want to add the factory-connectors (conveyor input and outputs).
For that, we’ll be adding two components of type FGFactoryConnectionComponent to the actor and placing them where they looks appropriate.
Use + Add Component to add a component of type FGFactory Connection to the actor and name it "Input0".
Duplicate it and rename the copy to "Output0". This naming pattern follows that of base-game machines and may be required by some game functions.
In the Viewport, rotate and position them on opposite faces of our mesh so that their positive x (red arrow) faces out from the sides of the machine.
Set the output component’s Direction property to Output and the Connector to Conveyor. Do the same for the input component, but change its direction property to Input.
Be sure that both components have M Forward Peek and Grab to Buildable checked.
This step is essential for the item counting code to function correctly.
We also want to make our machine depend on electricity. For that we’ll need to add two more components via + Add Component.
First is a FGPowerConnection; place it at the position of the power connecter visual of the mesh.
Set M Max Num Connections to 1 so it behaves like the machines in the base game. However, you could raise this if you so desire.
Second, add a FGPowerInfo component.
If we had used one of the other types of base machine classes, these may have existed automatically, but since we chose FGBuildable, we need to add them ourselves.
Init logic
The init logic happens in the BeginPlay event and initializes the base state of the machine (also based on the save information).
There is not that much we need to do here.
The only thing we need to do is to set the PowerInfo on the PowerConnection and configure the target consumption of the FGPowerInfo to something like 1.0.
This controls how much power in MW the building will use to operate.
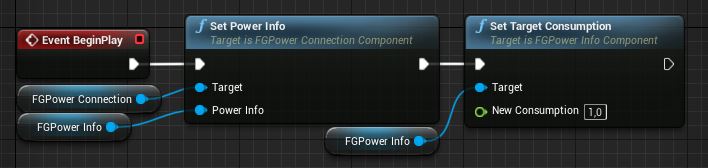
(Logic in the Event Graph)
Grab Logic
|
It is generally unwise to implement conveyor grab logic in Unreal Blueprint code as the tutorial does here. If you plan for your buildings to be used in any substantive quantity, you should implement this logic in C++ to avoid the performance overhead of Blueprint. This tutorial will eventually™ be replaced with another one following better practices. |
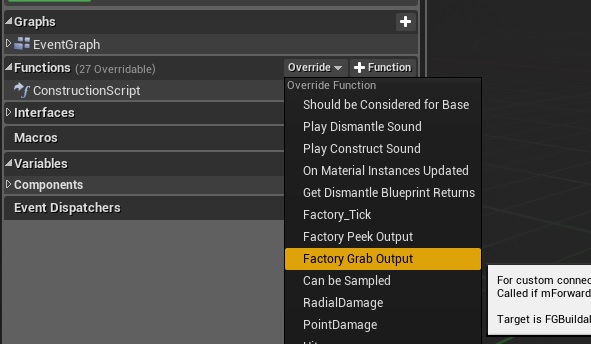
The FGBuildable class provides a FactoryGrabOutput function that will get executed by our output connector when a new item gets requested.
Connecting a belt will cause a new item to be requested at the speed of the belt.
It wont know how to respond to a request by default - to control how our machine behaves we’ll need to setup and override of the FactoryGrabOutput function.
Because we want to store the count of items transferred and the count of different item-types, we will need to add a new global integer variable.
Let’s call it "itemAmount".
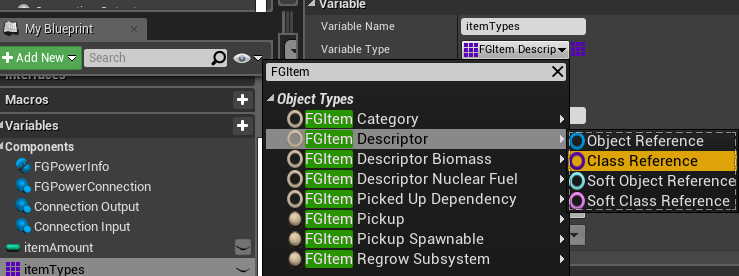
We’ll also need an array of FGItem Descriptor-Classes, which we’ll call "itemTypes".
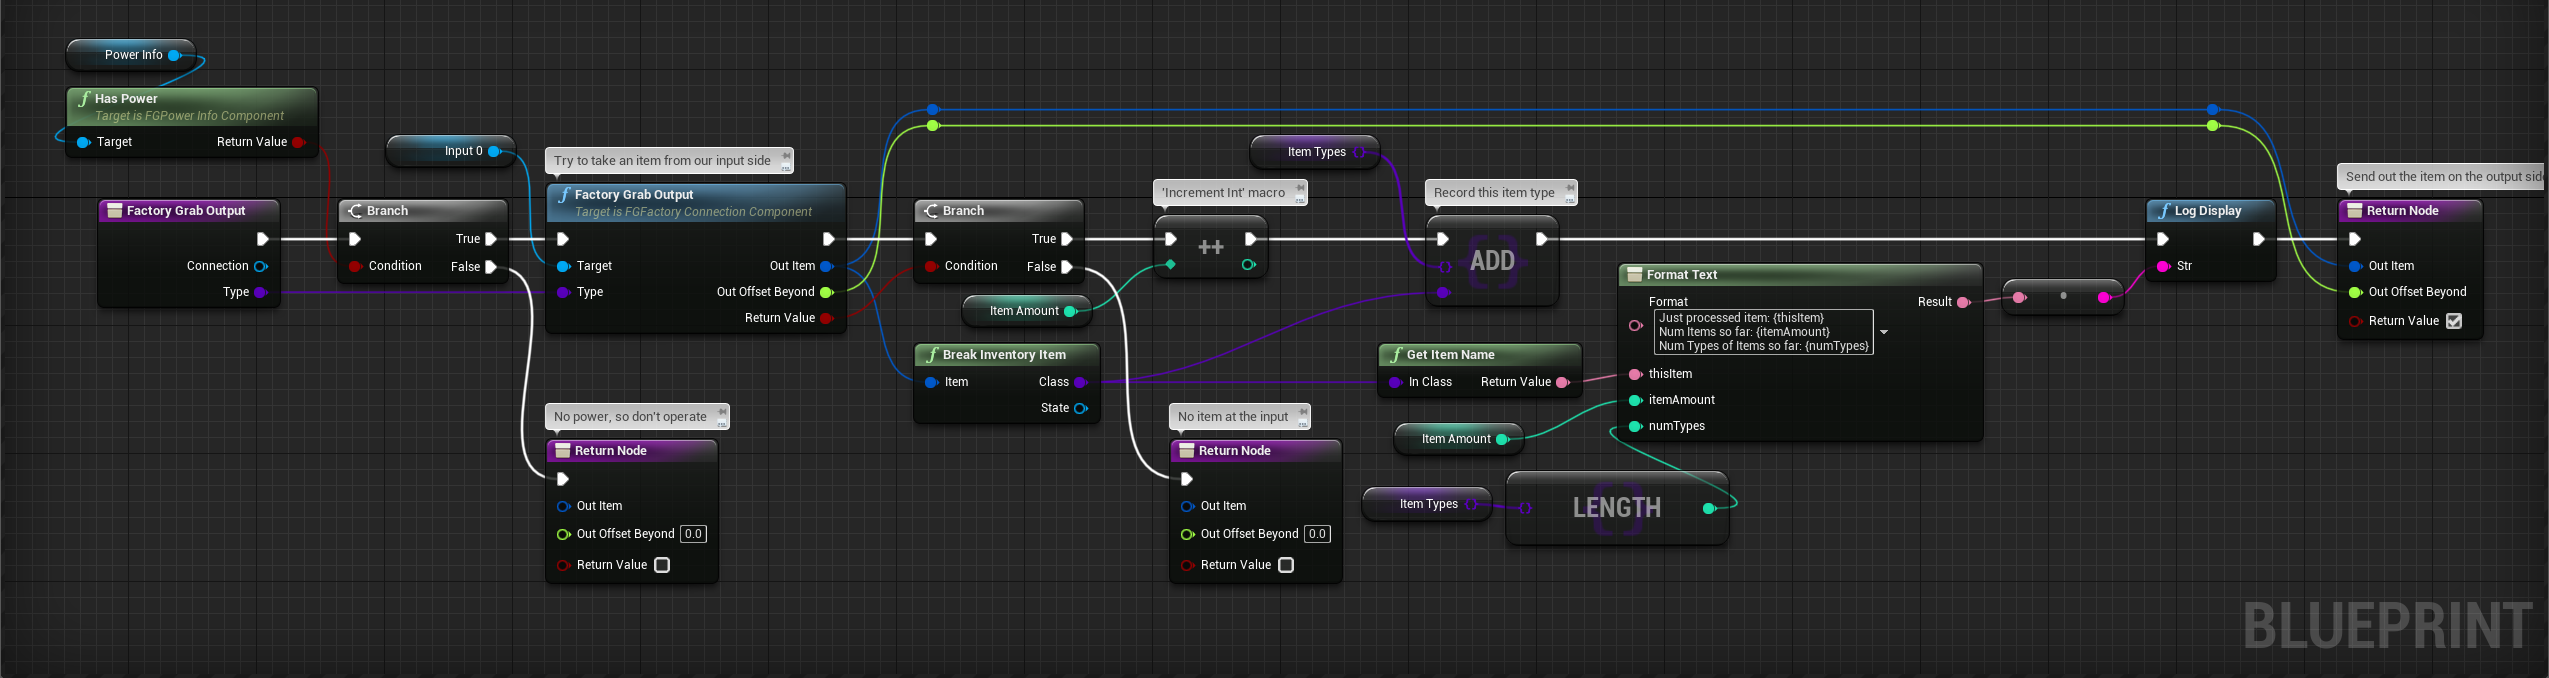
Now, in the grab logic, first we check if the machine has power. We do this by using the "HasPower"-node of the FGPowerInfoComponent. If it responds false, we return nothing and set the output to false. But if it’s true, we use the grab function of the input connector to request a new item.
If the input grab boolean is true, we increase the "itemAmount" integer by one and add the item unique to the "itemTypes". After that we return the item we got from the grab and set the output boolean to true.
If the input grab boolean is false, we just return nothing and the output boolean is set to false.
Overall the logic becomes: checks if we have power. If we do, try and get a item from the input. If there’s no item, we do nothing. But if we get a item, we count it and then return it to the output.
We also add a Log Display node near the end for debugging purposes. Details on getting a Live view of the game log can be found here.
That should be it, try out your newly created machine!